I very, very nearly didn t make it to DebConf this year, I had a bad cold/flu for a few days before I left, and after a negative covid-19 test just minutes before my flight, I decided to take the plunge and travel.
This is just everything in chronological order, more or less, it s the only way I could write it.
DebCamp
I planned to spend DebCamp working on various issues. Very few of them actually got done, I spent the first few days in bed further recovering, took a covid-19 test when I arrived and after I felt better, and both were negative, so not sure what exactly was wrong with me, but between that and catching up with other Debian duties, I couldn t make any progress on catching up on the packaging work I wanted to do. I ll still post what I intended here, I ll try to take a few days to focus on these some time next month:
Calamares / Debian Live stuff:
#980209 installation fails at the install boot loader phase
#1021156 calamares-settings-debian: Confusing/generic program names
#681025 Put old themes in a new package named desktop-base-extra
#941642 desktop-base: split theme data files and desktop integrations in separate packages
The Egg theme that I want to develop for testing/unstable is based on Juliette Taka s Homeworld theme that was used for Bullseye. Egg, as in, something that hasn t quite hatched yet. Get it? (for #1038660)
Debian Social:
Set up Lemmy instance
I started setting up a Lemmy instance before DebCamp, and meant to finish it.
Migrate PeerTube to new server
We got a new physical server for our PeerTube instance, we should have more space for growth and it would help us fix the streaming feature on our platform.
Loopy:
I intended to get the loop for DebConf in good shape before I left, so that we can spend some time during DebCamp making some really nice content, unfortunately this went very tumbly, but at least we ended up with a loopy that kind of worked and wasn t too horrible. There s always another DebConf to try again, right?
So DebCamp as a usual DebCamp was pretty much a wash (fitting with all the rain we had?) for me, at least it gave me enough time to recover a bit for DebConf proper, and I had enough time left to catch up on some critical DPL duties and put together a few slides for the Bits from the DPL talk.
DebConf
Bits From the DPL
I had very, very little available time to prepare something for Bits fro the DPL, but I managed to put some slides together (available on my wiki page).
I mostly covered:
A very quick introduction of myself (I ve done this so many times, it feels redundant giving my history every time), and some introduction on what it is that the DPL does. I declared my intent not to run for DPL again, and the reasoning behind it, and a few bits of information for people who may intend to stand for DPL next year.
The sentiment out there for the Debian 12 release (which has been very positive). How we include firmware by default now, and that we re saying goodbye to architectures both GNU/KFreeBSD and mipsel.
Debian Day and the 30th birthday party celebrations from local groups all over the world (and a reminder about the Local Groups BoF later in the week).
I looked forward to Debian 13 (trixie!), and how we re gaining riscv64 as a release architecture, as well as loongarch64, and that plans seem to be forming to fix 2k38 in Debian, and hopefully largely by the time the Trixie release comes by.
I made some comments about Enterprise Linux as people refer to the RHEL eco-system these days, how really bizarre some aspects of it is (like the kernel maintenance), and that some big vendors are choosing to support systems outside of that eco-system now (like CPanel now supporting Ubuntu too). I closed with the quote below from Ian Murdock, and assured the audience that if they want to go out and make money with Debian, they are more than welcome too.
Job Fair
I walked through the hallway where the Job Fair was hosted, and enjoyed all the buzz. It s not always easy to get this right, but this year it was very active and energetic, I hope lots of people made some connections!
Cheese & Wine
Due to state laws and alcohol licenses, we couldn t consume alcohol from outside the state of Kerala in the common areas of the hotel (only in private rooms), so this wasn t quite as big or as fun as our usual C&W parties since we couldn t share as much from our individual countries and cultures, but we always knew that this was going to be the case for this DebConf, and it still ended up being alright.
Day Trip
I opted for the forest / waterfalls daytrip. It was really, really long with lots of time in the bus. I think our trip s organiser underestimated how long it would take between the points on the route (all in all it wasn t that far, but on a bus on a winding mountain road, it takes long). We left at 8:00 and only found our way back to the hotel around 23:30. Even though we arrived tired and hungry, we saw some beautiful scenery, animals and also met indigenous river people who talked about their struggles against being driven out of their place of living multiple times as government invests in new developments like dams and hydro power.
Photos available in the DebConf23 public git repository.
Losing a beloved Debian Developer during DebConf
To our collective devastation, not everyone made it back from their day trips. Abraham Raji was out to the kayak day trip, and while swimming, got caught by a whirlpool from a drainage system.
Even though all of us were properly exhausted and shocked in disbelief at this point, we had to stay up and make some tough decisions. Some initially felt that we had to cancel the rest of DebConf. We also had to figure out how to announce what happened asap both to the larger project and at DebConf in an official manner, while ensuring that due diligence took place and that the family is informed by the police first before making anything public.
We ended up cancelling all the talks for the following day, with an address from the DPL in the morning to explain what had happened. Of all the things I ve ever had to do as DPL, this was by far the hardest. The day after that, talks were also cancelled for the morning so that we could attend his funeral. Dozens of DebConf attendees headed out by bus to go pay their final respects, many wearing the t-shirts that Abraham had designed for DebConf.
A book of condolences was set up so that everyone who wished to could write a message on how they remembered him. The book will be kept by his family.
Today marks a week since his funeral, and I still feel very raw about it. And even though there was uncertainty whether DebConf should even continue after his death, in hindsight I m glad that everyone pushed forward. While we were all heart broken, it was also heart warming to see people care for each other in all of this. If anything, I think I needed more time at DebConf just to be in that warm aura of emotional support for just a bit longer. There are many people who I wanted to talk to who I barely even had a chance to see.
Abraham, or Abru as he was called by some people (which I like because bru in Afrikaans is like bro in English, not sure if that s what it implied locally too) enjoyed artistic pursuits, but he was also passionate about knowledge transfer. He ran classes at DebConf both last year and this year (and I think at other local events too) where he taught people packaging via a quick course that he put together. His enthusiasm for Debian was contagious, a few of the people who he was mentoring came up to me and told me that they were going to see it through and become a DD in honor of him. I can t even remember how I reacted to that, my brain was already so worn out and stitching that together with the tragedy of what happened while at DebConf was just too much for me.
I first met him in person last year in Kosovo, I already knew who he was, so I think we interacted during the online events the year before. He was just one of those people who showed so much promise, and I was curious to see what he d achieve in the future. Unfortunately, we was taken away from us too soon.
Poetry Evening
Later in the week we had the poetry evening. This was the first time I had the courage to recite something. I read Ithaka by C.P. Cavafy (translated by Edmund Keely). The first time I heard about this poem was in an interview with Julian Assange s wife, where she mentioned that he really loves this poem, and it caught my attention because I really like the Weezer song Return to Ithaka and always wondered what it was about, so needless to say, that was another rabbit hole at some point.
Group Photo
Our DebConf photographer organised another group photo for this event, links to high-res versions available on Aigar s website.
BoFs
I didn t attend nearly as many talks this DebConf as I would ve liked (fortunately I can catch up on video, should be released soon), but I did make it to a few BoFs.
In the Local Groups BoF, representatives from various local teams were present who introduced themselves and explained what they were doing. From memory (sorry if I left someone out), we had people from Belgium, Brazil, Taiwan and South Africa. We talked about types of events a local group could do (BSPs, Mini DC, sprints, Debian Day, etc. How to help local groups get started, booth kits for conferences, and setting up some form of calendar that lists important Debian events in a way that makes it easier for people to plan and co-ordinate. There s a mailing list for co-ordination of local groups, and the irc channel is #debian-localgroups on oftc.
If you got one of these Cheese & Wine bags from DebConf, that s from the South African local group!
In the Debian.net BoF, we discussed the Debian.net hosting service, where Debian pays for VMs hosted for projects by individual DDs on Debian.net. The idea is that we start some form of census that monitors the services, whether they re still in use, whether the system is up to date, whether someone still cares for it, etc. We had some discussion about where the lines of responsibility are drawn, and we can probably make things a little bit more clear in the documentation. We also want to offer more in terms of backups and monitoring (currently DDs do get 500GB from rsync.net that could be used for backups of their services though). The intention is also to deploy some form of configuration management for some essentials across the hosts. We should also look at getting some sponsored hosting for this.
In the Debian Social BoF, we discussed some services that need work / expansion. In particular, Matrix keeps growing at an increased rate as more users use it and more channels are bridged, so it will likely move to its own host with big disks soon. We might replace Pleroma with a fork called Akkoma, this will need some more home work and checking whether it s even feasible. Some services haven t really been used (like Writefreely and Plume), and it might be time to retire them. We might just have to help one or two users migrate some of their posts away if we do retire them. Mjolner seems to do a fine job at spam blocking, we haven t had any notable incidents yet. WordPress now has improved fediverse support, it s unclear whether it works on a multi-site instance yet, I ll test it at some point soon and report back. For upcoming services, we are implementing Lemmy and probably also Mobilizon. A request was made that we also look into Loomio.
More Information Overload
There s so much that happens at DebConf, it s tough to take it all in, and also, to find time to write about all of it, but I ll mention a few more things that are certainly worth of note.
During DebConf, we had some people from the Kite Linux team over. KITE supplies the ICT needs for the primary and secondary schools in the province of Kerala, where they all use Linux. They decided to switch all of these to Debian. There was an ad-hoc BoF where locals were listening and fielding questions that the Kite Linux team had. It was great seeing all the energy and enthusiasm behind this effort, I hope someone will properly blog about this!
I learned about the VGLUG Foundation, who are doing a tremendous job at promoting GNU/Linux in the country. They are also training up 50 people a year to be able to provide tech support for Debian.
I came across the booth for Mostly Harmless, they liberate old hardware by installing free firmware on there. It was nice seeing all the devices out there that could be liberated, and how it can breathe new life into old harware.
Some hopefully harmless soldering.
Overall, the community and their activities in India are very impressive, and I wish I had more time to get to know everyone better.
Food
Oh yes, one more thing. The food was great. I tasted more different kinds of curry than I ever did in my whole life up to this point. The lunch on banana leaves was interesting, and also learning how to eat this food properly by hand (thanks to the locals who insisted on teaching me!), it was a fruitful experience? This might catch on at home too less dishes to take care of!
Special thanks to the DebConf23 Team
I think this may have been one of the toughest DebConfs to organise yet, and I don t think many people outside of the DebConf team knows about all the challenges and adversity this team has faced in organising it. Even just getting to the previous DebConf in Kosovo was a long and tedious and somewhat risky process. Through it all, they were absolute pro s. Not once did I see them get angry or yell at each other, whenever a problem came up, they just dealt with it. They did a really stellar job and I did make a point of telling them on the last day that everyone appreciated all the work that they did.
Back to my nest
I bought Dax a ball back from India, he seems to have forgiven me for not taking him along.
I ll probably take a few days soon to focus a bit on my bugs and catch up on my original DebCamp goals. If you made it this far, thanks for reading! And thanks to everyone for being such fantastic people.
/usr-merge work, by Helmut Grohne, et al.
Given that we now have consensus on moving forward by moving aliased files
from / to /usr, we will also run into the problems that the file move
moratorium was meant to prevent. The way forward is detecting them early and
applying workarounds on a per-package basis. Said detection is now automated
using the Debian Usr Merge Analysis Tool.
As problems are reported to the bug tracking system, they are connected to the
reports if properly usertagged. Bugs and patches for problem categories
DEP17-P2 and DEP17-P6 have been filed.
After consensus has been reached
on the bootstrapping matters, debootstrap has been
changed to swap the initial unpack and merging
to avoid unpack errors due to pre-existing links. This is a precondition for
having base-files install the aliasing symbolic links eventually.
It was identified that the root filesystem used by the Debian installer is
still unmerged and a
change has been proposed.
debhelper was changed to
recognize systemd units installed to /usr.
A discussion with the CTTE and release team on repealing the moratorium has
been initiated.
Salsa CI work, by Santiago Ruano Rinc n
August was a busy month in the Salsa CI world. Santiago reviewed and merged a
bunch of MRs that have improved the project in different aspects:
The aptly job got two MRs from Philip Hands.
With the first one,
the aptly now can export a couple of variables in a dotenv file,
and with the second,
it can include packages from multiple artifact directories. These MRs bring the
base to improve how to test reverse dependencies with Salsa CI. Santiago is
working on documenting this.
As a result of the
mass bug filing done in August,
Salsa CI now includes a job to test how a package builds twice in a row. Thanks
to the MRs of Sebastiaan Couwenberg
and Johannes Schauer Marin Rodrigues.
Last but not least, Santiago helped Johannes Schauer Marin Rodrigues to
complete the support for arm64-only pipelines.
DebConf23 lead-up, by Stefano Rivera
Stefano wears a few hats in the DebConf organization and in the lead up to the
conference in mid-September, they ve all been quite busy.
As one of the treasurers of DebConf 23, there has been a final budget update,
and quite a few payments to coordinate from Debian s Trusted Organizations. We
try to close the books from the previous conference at the next one, so a push
was made to get DebConf 22 account statements out of TOs and record them in the
conference ledger.
As a website developer, we had a number of registration-related tasks, emailing
attendees and trying to estimate numbers for food and accommodation.
As a conference committee member, the job was mostly taking calls and helping
the local team to make decisions on urgent issues. For example, getting
conference visas issued to attendees required getting political approval from
the Indian government. We only discovered the full process for this too late to
clear some complex cases, so this required some hard calls on skipping some
countries from the application list, allowing everyone else to get visas in
time. Unfortunate, but necessary.
Miscellaneous contributions
Rapha l Hertzog updated
gnome-shell-extension-hamster
to a new upstream git snapshot that is compatible with GNOME Shell 44 that
was recently uploaded to Debian unstable/testing. This extension makes it
easy to start/stop tracking time with
Hamster Time Tracker.
Very handy for consultants like us who are billing their work per hour.
Rapha l also updated zim to the latest
upstream release (0.74.2). This is a desktop wiki that can be very useful
as a note-taking tool to build your own personal knowledge base or even to
manage your personal todo lists.
Utkarsh helped the local team and the bursary team with some more DebConf
activities and helped finalize the data.
Thorsten tried to update package hplip.
Unfortunately upstream added some new compressed files that need to appear
uncompressed in the package. Even though this sounded like an easy task,
which seemed to be already implemented in the current debian/rules, the new
type of files broke this implementation and made the package no longer
buildable. The problem has been solved and the upload will happen soon.
Helmut sent 7 patches for cross build failures. Since dpkg-buildflags now
defaults to issue arm64-specific compiler flags, more care is needed to
distinguish between build architecture flags and host architecture flags than
previously.
Stefano pushed the final bit of the tox 4 transition over the line in Debian,
allowing dh-python and tox 4 to migrate to testing. We got caught up in a few
unusual bugs in tox and the way we run it in Debian package building (which
had to change with tox 4). This resulted in a couple of patches upstream.
Stefano visited Haifa, Israel, to see the proposed DebConf 24 venue and meet
with the local team. While the venue isn t committed yet, we have high hopes
for it.
Welcome to the August 2023 report from the Reproducible Builds project!
In these reports we outline the most important things that we have been up to over the past month. As a quick recap, whilst anyone may inspect the source code of free software for malicious flaws, almost all software is distributed to end users as pre-compiled binaries.
The motivation behind the reproducible builds effort is to ensure no flaws have been introduced during this compilation process by promising identical results are always generated from a given source, thus allowing multiple third-parties to come to a consensus on whether a build was compromised. If you are interested in contributing to the project, please visit our Contribute page on our website.
The move has generated a fair amount of push back among developers who worry about its future legal and technical implications, along with a potential for supply chain attacks, should the maintainer account publishing these binaries be compromised.
[ ] an overview about reproducible builds, the past, the presence and the future. How it started with a small [meeting] at DebConf13 (and before), how it grew from being a Debian effort to something many projects work on together, until in 2021 it was mentioned in an executive order of the president of the United States. (HTML slides)
Reproducible Builds Summit
Just another reminder that our upcoming Reproducible Builds Summit is set to take place from October 31st November 2nd 2023 in Hamburg, Germany.
Our summits are a unique gathering that brings together attendees from diverse projects, united by a shared vision of advancing the Reproducible Builds effort. During this enriching event, participants will have the opportunity to engage in discussions, establish connections and exchange ideas to drive progress in this vital field.
If you re interested in joining us this year, please make sure to read the event page, the news item, or the invitation email that Mattia Rizzolo sent out, which have more details about the event and location.
We are also still looking for sponsors to support the event, so do reach out to the organizing team if you are able to help. (Also of note that PackagingCon 2023 is taking place in Berlin just before our summit, and their schedule has just been published.)
Vagrant Cascadian on the Sustain podcast
Vagrant Cascadian was interviewed on the SustainOSS podcast on reproducible builds:
Vagrant walks us through his role in the project where the aim is to ensure identical results in software builds across various machines and times, enhancing software security and creating a seamless developer experience. Discover how this mission, supported by the Software Freedom Conservancy and a broad community, is changing the face of Linux distros, Arch Linux, openSUSE, and F-Droid. They also explore the challenges of managing random elements in software, and Vagrant s vision to make reproducible builds a standard best practice that will ideally become automatic for users. Vagrant shares his work in progress and their commitment to the last mile problem.
Website updates
Rahul Bajaj updated our website to add a series of environment variations related to reproducible builds [], Russ Cox added the Go programming language to our projects page [] and Vagrant Cascadian fixed a number of broken links and typos around the website [][][].
Software development
In diffoscope development this month, versions 247, 248 and 249 were uploaded to Debian unstable by Chris Lamb, who also added documentation for the new specialize_as method and expanding the documentation of the existing specialize as well []. In addition, Fay Stegerman added specialize_as and used it to optimise .smali comparisons when decompiling Android .apk files [], Felix Yan and Mattia Rizzolo corrected some typos in code comments [,], Greg Chabala merged the RUN commands into single layer in the package s Dockerfile [] thus greatly reducing the final image size. Lastly, Roland Clobus updated tool descriptions to mark that the xb-tool has moved package within Debian [].
reprotest is our tool for building the same source code twice in different environments and then checking the binaries produced by each build for any differences. This month, Vagrant Cascadian updated the packaging to be compatible with Tox version 4. This was originally filed as Debian bug #1042918 and Holger Levsen uploaded this to change to Debian unstable as version 0.7.26 [].
Upstream patches
The Reproducible Builds project detects, dissects and attempts to fix as many currently-unreproducible packages as possible. We endeavour to send all of our patches upstream where appropriate. This month, we wrote a large number of such patches, including:
Testing framework
The Reproducible Builds project operates a comprehensive testing framework (available at tests.reproducible-builds.org) in order to check packages and other artifacts for reproducibility. In August, a number of changes were made by Holger Levsen:
Disable Debian live image creation jobs until an OpenQA credential problem has been fixed. []
Run our maintenance scripts every 3 hours instead of every 2. []
Export data for unstable to the reproducible-tracker.json data file. []
Stop varying the build path, we want reproducible builds. []
Temporarily stop updating the pbuilder.tgz for Debian unstable due to #1050784. [][]
Correctly document that we are not variying usrmerge. [][]
Mark two armhf nodes (wbq0 and jtx1a) as down; investigation is needed. []
Misc:
Force reconfiguration of all Jenkins jobs, due to the recent rise of zombie processes. []
In the node health checks, also try to restart failed ntpsec, postfix and vnstat services. [][][]
System health checks:
Detect Debian live build failures due to missing credentials. [][]
Ignore specific types of known zombie processes. [][]
In addition, Vagrant Cascadian updated the scripts to use a predictable build path that is consistent with the one used on buildd.debian.org. [][]
If you are interested in contributing to the Reproducible Builds project, please visit our Contribute page on our website. However, you can get in touch with us via:
This is a short announcement to say that I have changed my main
OpenPGP key. A signed statement is available with the
cryptographic details but, in short, the reason is that I stopped
using my old YubiKey NEO that I have worn on my keyring since
2015.
I now have a YubiKey 5 which supports ED25519 which features much
shorter keys and faster decryption. It allowed me to move all my
secret subkeys on the key (including encryption keys) while retaining
reasonable performance.
I have written extensive documentation on how to do that OpenPGP key
rotation and also YubiKey OpenPGP operations.
Warning on storing encryption keys on a YubiKey
People wishing to move their private encryption keys to such a
security token should be very careful as there are special
precautions to take for disaster recovery.
I am toying with the idea of writing an article specifically about
disaster recovery for secrets and backups, dealing specifically with
cases of death or disabilities.
Autocrypt changes
One nice change is the impact on Autocrypt headers, which are
considerably shorter.
Before, the header didn't even fit on a single line in an email, it
overflowed to five lines:
Note that I have implemented my own kind of ridiculous Autocrypt
support for the NotmuchEmacs email client I use, see this
elisp code. To import keys, I pipe the message into this
script which is basically just:
sq autocrypt decode gpg --import
... thanks to Sequoia best-of-class Autocrypt support.
Note on OpenPGP usage
While some have claimed OpenPGP's death, I believe those are
overstated. Maybe it's just me, but I still use OpenPGP for my
password management, to authenticate users and messages, and it's the
interface to my YubiKey for authenticating with SSH servers.
I understand people feel that OpenPGP is possibly insecure,
counter-intuitive and full of problems, but I think most of those
problems should instead be attributed to its current flagship
implementation, GnuPG. I have tried to work with GnuPG for years, and
it keeps surprising me with evilness and oddities.
I have high hopes that the Sequoia project can bring some sanity
into this space, and I also hope that RFC4880bis can eventually
get somewhere so we have a more solid specification with more robust
crypto. It's kind of a shame that this has dragged on for so
long, but Update: there's a separate draft called
openpgp-crypto-refresh that might actually be adopted as the
"OpenPGP RFC" soon! And
it doesn't keep real work from happening in Sequoia and other
implementations. Thunderbird rewrote their OpenPGP implementation with
RNP (which was, granted, a bumpy road because it lost
compatibility with GnuPG) and Sequoia now has a certificate store
with trust management (but still no secret storage), preliminary
OpenPGP card support and even a basic GnuPG compatibility
layer. I'm also curious to try out the OpenPGP CA
capabilities.
So maybe it's just because I'm becoming an old fart that doesn't want
to change tools, but so far I haven't seen a good incentive in
switching away from OpenPGP, and haven't found a good set of tools
that completely replace it. Maybe OpenSSH's keys and CA can eventually
replace it, but I suspect they will end up rebuilding most of OpenPGP
anyway, just more slowly. If they do, let's hope they avoid the
mistakes our community has done in the past at least...
Debian Project Bits
Volume 1, Issue 1August 05, 2023
Welcome to the inaugural issue of Debian Project Bits!
Those remembering the Debian Weekly News (DwN) will recognize some of the sections here which served as our inspiration.
Debian Project Bits posts will allow for a faster turnaround of some project
news on a monthly basis. The Debian Micronews
service will continue to share shorter news items, the Debian Project News
remains as our official newsletter which may move to a biannual archive format.
News
Debian Day
The Debian Project was officially
founded by Ian Murdock on August 16,
1993. Since then we have celebrated our Anniversary of that date each year with
events around the world. We would love it if you could join our revels
this very special year as we have the honor of turning 30!
Attend or organize a local Debian Day
celebration. You're invited to plan your own event: from Bug Squashing parties
to Key Signing parties, Meet-Ups, or any type of social event whether large or
small. And be sure to check our Debian reimbursement How
To if you need such
resources.
You can share your days, events, thoughts, or notes with us and the
rest of the community with the #debianday tag that will be used across most
social media platforms. See you then!
Events: Upcoming and Reports
Upcoming
Debian 30 anos
The Debian Brasil Community is organizing the
event Debian 30 anos to
celebrate the 30th anniversary of the Debian Project.
From August 14 to 18, between 7pm and 22pm (UTC-3) contributors will talk
online in Portuguese and we will live stream on
Debian Brasil YouTube channel.
DebConf23: Debian Developers Camp and Conference
The 2023 Debian Developers Camp (DebCamp) and Conference
(DebConf23) will be hosted this year in
Infopark, Kochi, India.
DebCamp is slated to run from September 3 through 9, immediately followed by
the larger DebConf, September 10 through 17.
If you are planning on attending the conference this year, now is the time to
ensure your travel documentation, visa
information,
bursary submissions, papers and relevant equipment are prepared. For more
information contact: debconf@debconf.
MiniDebConf Cambridge 2023
There will be a
MiniDebConf
held in Cambridge, UK, hosted by ARM for 4 days in November: 2 days for a
mini-DebCamp (Thu 23 - Fri 24), with space for dedicated development / sprint /
team meetings, then two days for a more regular MiniDebConf (Sat 25 - Sun 26)
with space for more general talks, up to 80 people.
Reports
During the last months, the Debian Community has organized some Bug Squashing Parties:
Tilburg, Netherlands. October 2022.
St-Cergue, Switzerland. January 2023
Montreal, Canada. February 2023
In January, Debian India hosted the MiniDebConf Tamil Nadu in Viluppuram, Tamil Nadu, India (Sat 28 - Sun 26).
The following month, the MiniDebConf Portugal 2023 was held in Lisbon (12 - 16 February 2023).
These events, seen as a stunning success by some of their attendees, demonstrate the vitality of
our community.
Debian Brasil Community at Campus Party Brazil 2023
Another edition of Campus Party Brazil
took place in the city of S o Paulo between July 25th and 30th. And one more
time the Debian Brazil Community was present. During the days in the available
space, we carry out some activities such as:
Gifts for attendees (stickers, cups, lanyards);
Workshop on how to contribute to the translation team;
Workshop on packaging;
Key signing party;
Information about the project;
For more info and a few photos, check out the organizers'
report.
MiniDebConf Bras lia 2023
From May 25 to 27, Bras lia hosted the MiniDebConf Bras lia
2023. This gathering was composed of
various activities such as talks, workshops, sprints, BSPs (Bug Squashing
Party), key signings, social events, and hacking, aimed to bring the community
together and celebrate the world's largest Free Software project: Debian.
For more information please see the
full report
written by the organizers.
Debian Reunion Hamburg 2023
This year the annual Debian Reunion Hamburg
was held from Tuesday 23 to 30 May starting with four days of
hacking followed by two days of talks, and then two more days of hacking. As
usual, people - more than forty-five attendees from Germany, Czechia, France,
Slovakia, and Switzerland - were happy to meet in person, to hack and chat
together, and much more. If you missed the live streams, the
video recordings
are available.
Translation workshops from the pt_BR team
The Brazilian translation team, debian-l10n-portuguese, had their first workshop
of 2023 in February with great results. The workshop was aimed at beginners,
working in DDTP/DDTSS.
For more information please see the full
report
written by the organizers.
And on June 13 another workshop took place to translate
The Debian Administrator's Handbook). The main
goal was to show beginners how to collaborate in the translation of this
important material, which has existed since 2004. The manual's translations
are hosted on
Weblate.
Releases
Stable Release
Debian 12 bookworm was released on
June 10, 2023. This new version
becomes the stable release of Debian and moves the prior Debian 11
bullseye release to
oldstable status. The Debian
community celebrated the release with 23
Release Parties all around the
world.
Bookworm's first point release 12.1
address miscellaneous bug fixes affecting 88 packages, documentation, and
installer updates was made available on July 22,
2023.
RISC-V support
riscv64 has recently been added to the
official Debian architectures for support of 64-bit little-endian
RISC-V hardware running the Linux kernel. We expect
to have full riscv64 support in Debian 13 trixie. Updates on bootstrap,
build daemon, porterbox, and development progress were recently shared by the
team in a Bits from the Debian riscv64 porters
post.
non-free-firmware
The Debian 12 bookworm archive now includes non-free-firmware; please be
sure to update your apt sources.list if your systems requires such components
for operation. If your previous sources.list included non-free for this
purpose it may safely be removed.
apt sources.list
The Debian archive holds several components:
main: Contains
DFSG-compliant packages,
which do not rely on software outside this area to operate.
contrib:
Contains packages that contain DFSG-compliant software, but have dependencies
not in main.
non-free:
Contains software that does not comply with the DFSG.
non-free-firmware: Firmware that is otherwise not part of the Debian system
to enable use of Debian with hardware that requires such firmware.
For more information and guidelines on proper configuration of the apt
source.list file please see the Configuring Apt Sources -
Wiki page.
Inside Debian
New Debian Members
Please welcome the following newest Debian Project Members:
Marius Gripsgard (mariogrip)
Mohammed Bilal (rmb)
Emmanuel Arias (amanu)
Robin Gustafsson (rgson)
Lukas M rdian (slyon)
David da Silva Polverari (polverari)
To find out more about our newest members or any Debian Developer, look
for them on the Debian People list.
Security
Debian's Security Team releases current advisories on a daily basis.
Some recently released advisories concern these packages:
trafficserver
Several vulnerabilities were discovered in Apache Traffic Server, a
reverse and forward proxy server, which could result in information
disclosure or denial of service.
asterisk
A flaw was found in Asterisk, an Open Source Private Branch Exchange. A
buffer overflow vulnerability affects users that use PJSIP DNS resolver.
This vulnerability is related to CVE-2022-24793. The difference is that
this issue is in parsing the query record parse_query(), while the issue
in CVE-2022-24793 is in parse_rr(). A workaround is to disable DNS
resolution in PJSIP config (by setting nameserver_count to zero) or use
an external resolver implementation instead.
flask
It was discovered that in some conditions the Flask web framework may
disclose a session cookie.
chromium
Multiple security issues were discovered in Chromium, which could result
in the execution of arbitrary code, denial of service or information
disclosure.
Other
Popular packages
gpgv - GNU privacy guard
signature verification tool. 99,053 installations.
gpgv is actually a stripped-down version of gpg which
is only able to check signatures. It is somewhat smaller than the fully-blown
gpg and uses a different (and simpler) way to check that the public keys used
to make the signature are valid. There are no configuration files and only a
few options are implemented.
dmsetup - Linux Kernel Device
Mapper userspace library. 77,769 installations.
The Linux Kernel Device Mapper is the LVM (Linux
Logical Volume Management) Team's implementation of a minimalistic kernel-space
driver that handles volume management, while keeping knowledge of the
underlying device layout in user-space. This makes it useful for not only LVM,
but software raid, and other drivers that create "virtual" block devices.
sensible-utils - Utilities
for sensible alternative selection. 96,001 daily users.
This package provides a number of small utilities which
are used by programs to sensibly select and spawn an appropriate browser,
editor, or pager. The specific utilities included are: sensible-browser
sensible-editor sensible-pager.
popularity-contest -
The popularity-contest package. 90,758 daily users.
The popularity-contest package sets up a cron job that
will periodically anonymously submit to the Debian developers statistics about
the most used Debian packages on the system. This information helps Debian
make decisions such as which packages should go on the first CD. It also lets
Debian improve future versions of the distribution so that the most popular
packages are the ones which are installed automatically for new users.
New and noteworthy packages in unstable
Toolkit for scalable simulation of distributed applications
SimGrid is a toolkit that provides core
functionalities for the simulation of distributed applications in heterogeneous
distributed environments. SimGrid can be used as a Grid simulator, a P2P
simulator, a Cloud simulator, a MPI simulator, or a mix of all of them. The
typical use-cases of SimGrid include heuristic evaluation, application
prototyping, and real application development and tuning. This package
contains the dynamic libraries and runtime.
LDraw mklist program
3D CAD programs and rendering programs using the LDraw
parts library of LEGO parts rely on a file called parts.lst containing a list
of all available parts. The program ldraw-mklist is used to generate this list
from a directory of LDraw parts.
Open Lighting Architecture - RDM Responder Tests
The DMX512 standard for Digital MultipleX is used for
digital communication networks commonly used to control stage lighting and
effects. The Remote Device Management protocol is an extension to DMX512,
allowing bi-directional communication between RDM-compliant devices without
disturbing other devices on the same connection. The Open Lighting
Architecture (OLA) provides a plugin framework for distributing DMX512 control
signals. The ola-rdm-tests package provides an automated way to check protocol
compliance in RDM devices.
parsec-service
Parsec is an abstraction layer that can be used to
interact with hardware-backed security facilities such as the Hardware Security
Module (HSM), the Trusted Platform Module (TPM), as well as firmware-backed and
isolated software services. The core component of Parsec is the security
service, provided by this package. The service is a background process that
runs on the host platform and provides connectivity with the secure facilities
of that host, exposing a platform-neutral API that can be consumed into
different programming languages using a client library. For a client library
implemented in Rust see the package librust-parsec-interface-dev.
Simple network calculator and lookup tool
Process and lookup network addresses from the command
line or CSV with ripalc. Output has a variety of customisable formats.
High performance, open source CPU/GPU miner and RandomX benchmark
XMRig is a high performance, open source, cross
platform RandomX, KawPow, CryptoNight, and GhostRider unified CPU/GPU miner and
RandomX benchmark.
Ping, but with a graph - Rust source code
This package contains the source for the Rust gping
crate, packaged by debcargo for use with cargo and dh-cargo.
Once upon a time in Debian:
2014-07-31 The Technical committee choose
libjpeg-turbo
as the default JPEG decoder.
2010-08-01
DebConf10 starts New York City, USA
2007-08-05
Debian Maintainers approved by vote
2009-08-05 Jeff Chimene files bug
#540000 against
live-initramfs.
Calls for help
The Publicity team calls for volunteers and help!
Your Publicity team is asking for help from you our readers, developers, and
interested parties to contribute to the Debian news effort. We implore you to
submit items that may be of interest to our community and also ask for your
assistance with translations of the news into (your!) other languages along
with the needed second or third set of eyes to assist in editing our work
before publishing. If you can share a small amount of your time to aid our
team which strives to keep all of us informed, we need you. Please reach out
to us via IRC on #debian-publicity
on OFTC.net, or our public mailing list,
or via email at press@debian.org for sensitive or
private inquiries.
The 2020 Solarwinds attack was a tipping point that caused a heightened awareness about the security of the software supply chain and in particular the large amount of trust placed in build systems. Reproducible Builds (R-Bs) provide a strong foundation to build defenses for arbitrary attacks against build systems by ensuring that given the same source code, build environment, and build instructions, bitwise-identical artifacts are created. (PDF)
I have identified 16 root causes for unreproducible builds in my empirical study, which I have linked to the corresponding documentation. The initial MR right now contains information about 10 root causes. For each root cause, I have provided a definition, a notable instance, and a workaround. However, I have only found workarounds for 5 out of the 10 root causes listed in this merge request. In the upcoming commits, I plan to add an additional 6 root causes. I kindly request you review the text for any necessary refinements, modifications, or corrections. Additionally, I would appreciate the help with documentation for the solutions/workarounds for the remaining root causes: Archive Metadata, Build ID, File System Ordering, File Permissions, and Snippet Encoding. Your input on the identified root causes for unreproducible builds would be greatly appreciated. []
Just a reminder that our upcoming Reproducible Builds Summit is set to take place from October 31st November 2nd 2023 in Hamburg, Germany.
Our summits are a unique gathering that brings together attendees from diverse projects, united by a shared vision of advancing the Reproducible Builds effort. During this enriching event, participants will have the opportunity to engage in discussions, establish connections and exchange ideas to drive progress in this vital field.
If you re interested in joining us this year, please make sure to read the event page which has more details about the event and location.
There was more progress towards making the Go programming language ecosystem reproducible this month, including:
Adding a new subpage on the GoLang website to show reproduction of the published Go binaries, along with release candidates along with a new binary to produce the given results. This has resulted in page of unreproducible packages as well as a reproducible releases page. This was achieved via Go bug #513700.
while packaging govulncheck for Arch Linux I noticed a checksum mismatch for a tar file I downloaded from go.googlesource.com. I used diffoscope to compare the .tar file I downloaded with the .tar file the build server downloaded, and noticed the timestamps are different.
In Debian, 20 reviews of Debian packages were added, 25 were updated and 25 were removed this month adding to our knowledge about identified issues. A number of issue types were updated, including marking ffile_prefix_map_passed_to_clang being fixed since Debian bullseye [] and adding a Debian bug tracker reference for the nondeterminism_added_by_pyqt5_pyrcc5 issue [].
In addition, Roland Clobus posted another detailed update of the status of reproducible Debian ISO images on our mailing list. In particular, Roland helpfully summarised that live images are looking good, and the number of (passing) automated tests is growing .
Bernhard M. Wiedemann published another monthly report about reproducibility within openSUSE.
F-Droid added 20 new reproducible apps in July, making 165 apps in total that are published with Reproducible Builds and using the upstream developer s signature. []
The Sphinx documentation tool recently accepted a change to improve deterministic
reproducibility of documentation. It s internal util.inspect.object_description
attempts to sort collections, but this can fail. The change handles the failure case by using string-based object descriptions as a
fallback deterministic sort ordering, as well as adding recursive object-description calls for list and tuple datatypes. As a result,
documentation generated by Sphinx will be more likely to be automatically reproducible.
Lastly in news, kpcyrd posted to our mailing list announcing a new repro-env tool:
My initial interest in reproducible builds was how do I distribute pre-compiled binaries on GitHub without people raising security concerns about them . I ve cycled back to this original problem about 5 years later and built a tool that is meant to address this. []
Upstream patches
The Reproducible Builds project detects, dissects and attempts to fix as many currently-unreproducible packages as possible. We endeavour to send all of our patches upstream where appropriate. This month, we wrote a large number of such patches, including:
openjdk/jfx#446 (openjfx), Enable reproducible builds with SOURCE_DATE_EPOCH, a three-and-a-half year effort started by Bernhard M. Wiedemann in January 2020, taken over by John Neffenger in March 2021, integrated upstream in June 2023, and available starting with JavaFX 21 on September 19, 2023.
In diffoscope development this month, versions 244, 245 and 246 were uploaded to Debian unstable by Chris Lamb, who also made the following changes:
Don t include the file size in image metadata. It is, at best, distracting, and it is already in the directory metadata. []
Add compatibility with libarchive-5. []
Mark that the test_dex::test_javap_14_differences test requires the procyon tool. []
Initial work on DOS/MBR extraction. []
Move to using assert_diff in the .ico and .jpeg tests. []
Temporarily mark some Android-related as XFAIL due to Debian bugs #1040941 & #1040916. []
Fix the test skipped reason generation in the case of a version outside of the required range. []
In addition, Gianfranco Costamagna added support for LLVM version 16. []
Testing framework
The Reproducible Builds project operates a comprehensive testing framework (available at tests.reproducible-builds.org) in order to check packages and other artifacts for reproducibility. In July, a number of changes were made by Holger Levsen:
General changes:
Upgrade Jenkins host to Debian bookworm now that Debian 12.1 is out. [][][][]
Adjust CSS layout for Arch Linux pages to match 3 and not 4 repos being tested. []
Drop the community Arch Linux repo as it has now been merged into the extra repo. []
Speed up a number of Arch-related database queries. []
Try harder to properly cleanup after building OpenWrt packages. []
Drop all kfreebsd-related tests now that it s officially dead. []
System health:
Always ignore some well-known harmless orphan processes. [][][]
Detect another case of job failure due to Jenkins shutdown. []
Show all non co-installable package sets on the status page. []
Warn that some specific reboot nodes are currently false-positives. []
Node health checks:
Run system and node health checks for Jenkins less frequently. []
Try to restart any failed dpkg-db-backup [] and munin-node services [].
In addition, Vagrant Cascadian updated the paths in our automated to tests to use the same paths used by the official Debian build servers. []
If you are interested in contributing to the Reproducible Builds project, please visit our Contribute page on our website. However, you can get in touch with us via:
The phrase "Root of Trust" turns up at various points in discussions about verified boot and measured boot, and to a first approximation nobody is able to give you a coherent explanation of what it means[1]. The Trusted Computing Group has a fairly wordy definition, but (a) it's a lot of words and (b) I don't like it, so instead I'm going to start by defining a root of trust as "A thing that has to be trustworthy for anything else on your computer to be trustworthy".
(An aside: when I say "trustworthy", it is very easy to interpret this in a cynical manner and assume that "trust" means "trusted by someone I do not necessarily trust to act in my best interest". I want to be absolutely clear that when I say "trustworthy" I mean "trusted by the owner of the computer", and that as far as I'm concerned selling devices that do not allow the owner to define what's trusted is an extremely bad thing in the general case)
Let's take an example. In verified boot, a cryptographic signature of a component is verified before it's allowed to boot. A straightforward implementation of a verified boot implementation has the firmware verify the signature on the bootloader or kernel before executing it. In this scenario, the firmware is the root of trust - it's the first thing that makes a determination about whether something should be allowed to run or not[2]. As long as the firmware behaves correctly, and as long as there aren't any vulnerabilities in our boot chain, we know that we booted an OS that was signed with a key we trust.
But what guarantees that the firmware behaves correctly? What if someone replaces our firmware with firmware that trusts different keys, or hot-patches the OS as it's booting it? We can't just ask the firmware whether it's trustworthy - trustworthy firmware will say yes, but the thing about malicious firmware is that it can just lie to us (either directly, or by modifying the OS components it boots to lie instead). This is probably not sufficiently trustworthy!
Ok, so let's have the firmware be verified before it's executed. On Intel this is "Boot Guard", on AMD this is "Platform Secure Boot", everywhere else it's just "Secure Boot". Code on the CPU (either in ROM or signed with a key controlled by the CPU vendor) verifies the firmware[3] before executing it. Now the CPU itself is the root of trust, and, well, that seems reasonable - we have to place trust in the CPU, otherwise we can't actually do computing. We can now say with a reasonable degree of confidence (again, in the absence of vulnerabilities) that we booted an OS that we trusted. Hurrah!
Except. How do we know that the CPU actually did that verification? CPUs are generally manufactured without verification being enabled - different system vendors use different signing keys, so those keys can't be installed in the CPU at CPU manufacture time, and vendors need to do code development without signing everything so you can't require that keys be installed before a CPU will work. So, out of the box, a new CPU will boot anything without doing verification[4], and development units will frequently have no verification.
As a device owner, how do you tell whether or not your CPU has this verification enabled? Well, you could ask the CPU, but if you're doing that on a device that booted a compromised OS then maybe it's just hotpatching your OS so when you do that you just get RET_TRUST_ME_BRO even if the CPU is desperately waving its arms around trying to warn you it's a trap. This is, unfortunately, a problem that's basically impossible to solve using verified boot alone - if any component in the chain fails to enforce verification, the trust you're placing in the chain is misplaced and you are going to have a bad day.
So how do we solve it? The answer is that we can't simply ask the OS, we need a mechanism to query the root of trust itself. There's a few ways to do that, but fundamentally they depend on the ability of the root of trust to provide proof of what happened. This requires that the root of trust be able to sign (or cause to be signed) an "attestation" of the system state, a cryptographically verifiable representation of the security-critical configuration and code. The most common form of this is called "measured boot" or "trusted boot", and involves generating a "measurement" of each boot component or configuration (generally a cryptographic hash of it), and storing that measurement somewhere. The important thing is that it must not be possible for the running OS (or any pre-OS component) to arbitrarily modify these measurements, since otherwise a compromised environment could simply go back and rewrite history. One frequently used solution to this is to segregate the storage of the measurements (and the attestation of them) into a separate hardware component that can't be directly manipulated by the OS, such as a Trusted Platform Module. Each part of the boot chain measures relevant security configuration and the next component before executing it and sends that measurement to the TPM, and later the TPM can provide a signed attestation of the measurements it was given. So, an SoC that implements verified boot should create a measurement telling us whether verification is enabled - and, critically, should also create a measurement if it isn't. This is important because failing to measure the disabled state leaves us with the same problem as before; someone can replace the mutable firmware code with code that creates a fake measurement asserting that verified boot was enabled, and if we trust that we're going to have a bad time.
(Of course, simply measuring the fact that verified boot was enabled isn't enough - what if someone replaces the CPU with one that has verified boot enabled, but trusts keys under their control? We also need to measure the keys that were used in order to ensure that the device trusted only the keys we expected, otherwise again we're going to have a bad time)
So, an effective root of trust needs to:
1) Create a measurement of its verified boot policy before running any mutable code 2) Include the trusted signing key in that measurement 3) Actually perform that verification before executing any mutable code
and from then on we're in the hands of the verified code actually being trustworthy, and it's probably written in C so that's almost certainly false, but let's not try to solve every problem today.
Does anything do this today? As far as I can tell, Intel's Boot Guard implementation does. Based on publicly available documentation I can't find any evidence that AMD's Platform Secure Boot does (it does the verification, but it doesn't measure the policy beforehand, so it seems spoofable), but I could be wrong there. I haven't found any general purpose non-x86 parts that do, but this is in the realm of things that SoC vendors seem to believe is some sort of value-add that can only be documented under NDAs, so please do prove me wrong. And then there are add-on solutions like Titan, where we delegate the initial measurement and validation to a separate piece of hardware that measures the firmware as the CPU reads it, rather than requiring that the CPU do it.
But, overall, the situation isn't great. On many platforms there's simply no way to prove that you booted the code you expected to boot. People have designed elaborate security implementations that can be bypassed in a number of ways.
[1] In this respect it is extremely similar to "Zero Trust" [2] This is a bit of an oversimplification - once we get into dynamic roots of trust like Intel's TXT this story gets more complicated, but let's stick to the simple case today [3] I'm kind of using "firmware" in an x86ish manner here, so for embedded devices just think of "firmware" as "the first code executed out of flash and signed by someone other than the SoC vendor" [4] In the Intel case this isn't strictly true, since the keys are stored in the motherboard chipset rather than the CPU, and so taking a board with Boot Guard enabled and swapping out the CPU won't disable Boot Guard because the CPU reads the configuration from the chipset. But many mobile Intel parts have the chipset in the same package as the CPU, so in theory swapping out that entire package would disable Boot Guard. I am not good enough at soldering to demonstrate that.
Reduce the size of your c: partition to the smallest it can be and then turn off windows with the understanding that you will never boot this system on the iron ever again.
Boot into a netinst installer image (no GUI). hold alt and press left arrow a few times until you get to a prompt to press enter. Press enter.
In this example /dev/sda is your windows disk which contains the c: partition
and /dev/disk/by-id/usb0 is the USB-3 attached SATA controller that you have your SSD attached to (please find an example attached). This SSD should be equal to or larger than the windows disk for best compatability.
To find the literal path names of your detected drives you can run fdisk -l. Pay attention to the names of the partitions and the sizes of the drives to help determine which is which.
Once you have a shell in the netinst installer, you should maybe be able to run a command like the following. This will duplicate the disk located at if (in file) to the disk located at of (out file) while showing progress as the status.
If you confirm that dd is available on the netinst image and the previous command runs successfully, test that your windows partition is visible in the new disk s partition table. The start block of the windows partition on each should match, as should the partition size.
fdisk -l /dev/disk/by-id/usb0
fdisk -l /dev/sda
If the output from the first is the same as the output from the second, then you are probably safe to proceed.
Once you confirm that you have made and tested a full copy of the blocks from your windows drive saved on your usb disk, nuke your windows partition table from orbit.
dd if=/dev/zero of=/dev/sda bs=1M count=42
You can press alt-f1 to return to the Debian installer now. Follow the instructions to install Debian. Don t forget to remove all attached USB drives.
Once you install Debian, press ctrl-alt-f3 to get a root shell.
Add your user to the sudoers group:
# adduser cjac sudoers
log out
# exit
log in as your user and confirm that you have sudo
$ sudo ls
Don t forget to read the spider man advice
enter your password
you ll need to install virt-manager. I think this should help:
I personally create a volume group called /dev/vg00 for the stuff I want to run raw and instead of converting to qcow2 like all of the other users do, I instead write it to a new logical volume.
sudo lvcreate /dev/vg00 -n windows -L 42G # or however large your drive was
sudo dd if=/dev/disk/by-id/usb0 of=/dev/vg00/windows status=progress
Now that you ve got the qcow2 file created, press alt-left until you return to your GDM session.
The apt-get install command above installed virt-manager, so log in to your system if you haven t already and open up gnome-terminal by pressing the windows key or moving your mouse/gesture to the top left of your screen. Type in gnome-terminal and either press enter or click/tap on the icon.
I like to run this full screen so that I feel like I m in a space ship. If you like to feel like you re in a spaceship, too, press F11.
You can start virt-manager from this shell or you can press the windows key and type in virt-manager and press enter. You ll want the shell to run commands such as virsh console windows or virsh list
When virt-manager starts, right click on QEMU/KVM and select New.
In the New VM window, select Import existing disk image
When prompted for the path to the image, use the one we created with sudo qemu-img convert above.
Select the version of Windows you want.
Select memory and CPUs to allocate to the VM.
Tick the Customize configuration before install box
If you re prompted to enable the default network, do so now.
The default hardware layout should probably suffice. Get it as close to the underlying hardware as it is convenient to do. But Windows is pretty lenient these days about virtualizing licensed windows instances so long as they re not running in more than one place at a time.
Good luck! Leave comments if you have questions.
co2mon.nz currently uses monitors based on Oliver Seiler s open source design which I am personally building. This post describes my exploration of how to achieve production of a CO2 monitor that could enable the growth of co2mon.nz.
Goals
Primarily I want to design a CO2 monitor which allows the majority of the production process to be outsourced. In particular, the PCB should be able to be assembled in an automated fashion (PCBA).
As a secondary goal, I d like to improve the aesthetics of the monitor while retaining the unique feature of displaying clear visual indication of the current ventilation level through coloured lights.
Overall, I ll consider the project successfull if I can achieve a visually attractive CO2 monitor which takes me less than 10 minutes per monitor to assemble/box/ship and whose production cost has the potential to be lower than the current model.
PCB
Schematic
The existing CO2 monitor design provides a solid foundation but relies upon the ESP32 Devkit board, which is intended for evaluation purposes and is not well suited to automated assembly. Replacing this devkit board with the underlying ESP32 module is the major change needed to enable PCBA production, which then also requires moving the supporting electronics from the devkit board directly onto the primary PCB.
The basic ESP32 chipset used in the devkit boards is no longer available as a discrete module suitable for placement directly onto a PCB which means the board will also have to be updated to use a more modern variant of the ESP32 chipset which is in active production such as the ESP32-S3. The ESP32-S3-WROOM1-N4 module is a very close match to the original devkit and will be suitable for this project.
In addition to the change of ESP module, I made the following other changes to the components in use:
Added an additional temperature/humidity sensor (SHT30). The current monitors take temperature/humidity measurements from the SCD40 chipset. These are primarily intended to help in the calculation of CO2 levels and rely on an offset being subtracted to account for the heat generated by the electronic components themselves. I ve found their accuracy to OK, but not perfect. SHT30 is a cheap part, so its addition to hopefully provide improved temperature/humidity measurement is an easy choice.
Swapped to USB-C instead of USB-B for the power connector. USB-C is much more common than USB-B and is also smaller and not as tall off the board which provides more flexibility in the case design.
With major components selected the key task is to draw the schematic diagram describing how they electrically connect to each other, which includes all the supporting electronics (e.g. resistors, capacitors, etc) needed.
I started out trying to use the EasyEDA/OSHWLab ecosystem thinking the tight integration with JLCPCB s assembly services would be a benefit, but the web interface was too clunky and limiting and I quickly got frustrated. KiCad proved to be a much more pleasant and capable tool for the job.
The reference design in the ESP32 datasheet (p28) and USB-C power supply examples from blnlabs were particularly helpful alongside the KiCad documentation and the example of the existing monitor in completing this step (click the image to enlarge).
Layout
The next step is to physically lay out where each component from the schematic will sit on the PCB itself. Obviously this requires first determining the overall size, shape and outline of the board and needs to occur in iteration with the intended design of the overall monitor, including the case, to ensure components like switches and USB sockets line up correctly.
In addition to the requirements around the look and function of the case, the components themselves also have considerations that must be taken into account, including:
For best WiFi reception, the ESP32 antenna should be at the top of the monitor and should not have PCB underneath it, or for a specified distance either side of it.
The SHT30 temperature sensor should be as far from any heat generating components (e.g. the ESP32, BME680 and SCD40 modules) as possible and also considering that any generated heat will rise, as low on the monitor as possible.
The sensors measuring the air (SCD40, BME680 and SHT30) must have good exposure to the air outside the case.
Taking all of these factors into account I ended up with a square PCB containing a cutout in the top right so that the ESP32 antenna can sit within the overall square outline while still meeting its design requirements. The SCD40 and BME680 sit in the top left corner, near the edges for good airflow and far away from the SHT30 temperature sensor in the bottom left corner. The LEDs I placed in a horizontal row across the center of the board, the LCD in the bottom right, a push button on the right-hand side and the USB-C socket in the center at the bottom.
Once the components are placed, the next big task is to route the traces (aka wires) between the components on the board such that all the required electrical connections are made without any unintended connections (aka shorts) being created. This is a fun constraint solving/optimisation challenge and takes on an almost artistic aspect with other PCB designers often having strong opinions on which layout is best. The majority of the traces and routing for this board were able to be placed on the top layer of the PCB, but I also made use of the back layer for a few traces to help avoid conflicts and deal with places where different traces needed to cross each other. It s easy to see how this step would be much more challenging and time consuming on a larger and more complex PCB design.
The final touches were to add some debugging breakouts for the serial and JTAG ports on the ESP32-S3 and a logo and various other helpful text on the silkscreen layer that will be printed on the PCB so it looks nice.
Production
For assembly of the PCB, I went with JLCPCB based out of China. The trickiest part of the process was component selection and ensuring that the parts I had planned in the schematic were available. JLCPCB in conjunction with lcsc.com provides a basic and extended part library. If you use only basic parts you get quicker and cheaper assembly, while using extended parts bumps your order into a longer process with a small fee charged for each component on the board.
Initially I spent a lot of time selecting components (particularly LEDs and switches) that were in the basic library before realising that the ESP32 modules are only available in the extended library! I think the lesson is that unless you re building the most trivial PCB with only passive components you will almost certainly end up in the advanced assembly process anyway, so trying to stay within the basic parts library is not worth the time.
Unfortunately the SCD40 sensor, the most crucial part of the monitor, is not stocked at all by JLCPCB/LCSC! To work around this JLCPCB will maintain a personal component library for you when you ship components to them to for use in future orders. Given the extra logistical time and hassle of having to do this, combined with having a number of SCD40 components already on hand I decided to have the boards assembled without this component populated for the initial prototype run. This also had the benefit of lowering the risk if something went wrong as the cost of the SCD40 is greater than the cost of the PCB and all the other components combined!
I found the kicad-jlcpcb-tools plugin for KiCad invaluable for keeping track of what part from lcsc.com I was planning to use for each component and generating the necessary output files for JLCPCB. The plugin allows you to store these mappings in your actual schematic which is very handy. The search interface it provides is fairly clunky and I found it was often easier to search for the part I needed on lcsc.com and then just copy the part number across into the plugin s search box rather than trying to search by name or component type.
The LCD screen is the remaining component which is not easily assembled onto the PCB directly, but as you ll see next, this actually turned out to be OK as integrating the screen directly into the case makes the final assembly process smoother.
The final surprise in the assembly process was the concept of edge rails, additional PCB material that is needed on either side of the board to help with feeding it through the assembly machine in the correct position. These can be added automatically by JLCPCB and have to be snapped off after the completed boards are received. I hadn t heard about these before and I was a little worried that they d interfere or get in the way of either the antenna cut-out at the top of the board, or the switch on the right hand side as it overhangs the edge so it can sit flush with the case.
In the end there was no issue with the edge rails. The switch was placed hanging over them without issue and snapping them off once the boards arrived was a trivial 30s job using a vice to hold the edge rail and then gently tipping the board over until it snapped off - the interface between the board and the rails while solid looking has obviously been scored or perforated in some way during the production process so the edge breaks cleanly and smoothly. Magic!
The process was amazingly quick with the completed PCBs (picture above) arriving within 7 days of the order being placed and looking amazing.
Case
Design
I mocked up a very simple prototype of the case in FreeCAD during the PCB design process to help position and align the placement of the screen, switch and USB socket on the PCB as all three of these components interface directly with the edges of the case. Initially this design was similar to the current monitor design where the PCB (with lights and screen attached) sits in the bottom of the case, which has walls containing grilles for airflow and then a separate transparent perspex is screwed onto the top to complete the enclosure.
As part of the aesthetic improvements for the new monitor I wanted to move away from a transparent front panel to something opaque but still translucent enough to allow the colour of the lights to show through. Without a transparent front panel the LCD also needs to be mounted directly into the case itself.
The first few prototype iterations followed the design of the original CO2 monitor with a flat front panel that attaches to the rest of the case containing the PCB, but the new requirement to also attach the LCD to the front panel proved to make this unworkable. To stay in place the LCD has to be pushed onto mounting poles containing a catch mechanism which requires a moderate amount of force and applying that force to the LCD board when it is already connected to the PCB is essentially impossible.
As a result I ended up completely flipping the design such that the front panel is a single piece of plastic that also encompasses the walls of the case and contains appropriate mounting stakes for both the screen and the main PCB.
Getting to this design hugely simplified the assembly process. Starting with an empty case lying face down on a bench, the LCD screen is pushed onto the mounting poles and sits flush with the cover of the case - easily achieved without the main PCB yet in place.
Next, the main PCB is gently lowered into the case facing downwards and sits on the mounting pole in each corner with the pins for the LCD just protruding through the appropriate holes in the PCB ready to be quickly soldered into place (this took significant iteration and tuning of dimensions/positioning to achieve!).
Finally, a back panel can be attached which holds the PCB in place and uses cantilever snap joints to click on to the rest of the case.
Overall the design is a huge improvement over the previous case which required screws and spacers to position the PCB and cover relative to the rest of the case, with the spacers and screws being particularly fiddly to work with.
The major concern I had with the new design was that the mount to attach the monitor to the wall has moved from being attached to the main case and components directly to needing to be on the removable back panel - if the clips holding this panel to the case fail the core part of the monitor will fall off the wall which would not be good. To guard against this I ve doubled the size and number of clips at the top of the case (which bears the weight) and the result seems very robust in my testing. To completely assemble a monitor, including the soldering step takes me about 2-3 minutes individually, and would be even quicker if working in batches.
Production
Given the number of design/testing iterations required to fine tune the case I chose not to outsource case production for now and used my 3D printer to produce them. I ve successfully used JLCPCB s 3D printing service for the previous case design, so I m confident that getting sufficient cases printed from JLCPCB or another supplier will not be an issue now that the design is finalised.
I tried a variety of filament colours, but settled on a transparent filament which once combined in the necessary layers to form the case is not actually transparent like perspex is, but provides a nice translucent medium which achieves the goal of having the light colour visible without exposing all of the circuit board detail. There s room for future improvement in the positioning of the LEDs on the circuit board to provide a more even distribution of light across the case but overall I really like the way the completed monitor ends up looking.
Evaluation
Building this monitor has been a really fun project, both in seeing something progress from an idea, to plans on a screen to a nice physical thing on my wall, but also in learning and developing a bunch of new skills in PCB design, assembly and 3D design.
The goal of having a CO2 monitor which I can outsource the vast majority of production of is as close to being met as I think is possible without undertaking the final proof of placing a large order. I ve satisfied myself that each step is feasible and that the final assembly process is quick, easy and well below the level of effort and time it was taking me to produce the original monitors.
Cost wise it s also a huge win, primarily in terms of the time taken, but also in the raw components - currently the five prototypes I ordered and built are on par with the component cost of the original CO2 monitor, but this will drop further with larger orders due to price breaks and amortisation of the setup and shipping expenses across more monitors.
This project has also given me a much better appreciation for how much I m only just scratching the surface of the potential complexities and challenges in producing a hardware product of this type.
I m reasonably confident I could successfully produce a few hundred and maybe even a few thousand monitors using this approach, but it s also clear that getting beyond that point is and would be a whole further level of effort and learning.
Hardware is hard work. That s not news to anyone, including me, but there is something to be said for experiencing the process first hand to make the reality of what s required real.
The PCB and case designs are both shared and can be found at https://github.com/co2monnz/co2monitor-pcb and https://github.com/co2monnz/cad, feedback and suggestions welcome!
I have several TB worth of family photos, videos, and other data. This needs to be backed up and archived.
Backups and archives are often thought of as similar. And indeed, they may be done with the same tools at the same time. But the goals differ somewhat:
Backups are designed to recover from a disaster that you can fairly rapidly detect.
Archives are designed to survive for many years, protecting against disaster not only impacting the original equipment but also the original person that created them.
Reflecting on this, it implies that while a nice ZFS snapshot-based scheme that supports twice-hourly backups may be fantastic for that purpose, if you think about things like family members being able to access it if you are incapacitated, or accessibility in a few decades time, it becomes much less appealing for archives. ZFS doesn t have the wide software support that NTFS, FAT, UDF, ISO-9660, etc. do.
This post isn t about the pros and cons of the different storage media, nor is it about the pros and cons of cloud storage for archiving; these conversations can readily be found elsewhere. Let s assume, for the point of conversation, that we are considering BD-R optical discs as well as external HDDs, both of which are too small to hold the entire backup set.
What would you use for archiving in these circumstances?
Establishing goals
The goals I have are:
Archives can be restored using Linux or Windows (even though I don t use Windows, this requirement will ensure the broadest compatibility in the future)
The archival system must be able to accommodate periodic updates consisting of new files, deleted files, moved files, and modified files, without requiring a rewrite of the entire archive dataset
Archives can ideally be mounted on any common OS and the component files directly copied off
Redundancy must be possible. In the worst case, one could manually copy one drive/disc to another. Ideally, the archiving system would automatically track making n copies of data.
While a full restore may be a goal, simply finding one file or one directory may also be a goal. Ideally, an archiving system would be able to quickly tell me which discs/drives contain a given file.
Ideally, preserves as much POSIX metadata as possible (hard links, symlinks, modification date, permissions, etc). However, for the archiving case, this is less important than for the backup case, with the possible exception of modification date.
Must be easy enough to do, and sufficiently automatable, to allow frequent updates without error-prone or time-consuming manual hassle
I would welcome your ideas for what to use. Below, I ll highlight different approaches I ve looked into and how they stack up.
Basic copies of directories
The initial approach might be one of simply copying directories across. This would work well if the data set to be archived is smaller than the archival media. In that case, you could just burn or rsync a new copy with every update and be done. Unfortunately, this is much less convenient with data of the size I m dealing with. rsync is unavailable in that case. With some datasets, you could manually design some rsyncs to store individual directories on individual devices, but that gets unwieldy fast and isn t scalable.
You could use something like my datapacker program to split the data across multiple discs/drives efficiently. However, updates will be a problem; you d have to re-burn the entire set to get a consistent copy, or rely on external tools like mtree to reflect deletions. Not very convenient in any case.
So I won t be using this.
tar or zip
While you can split tar and zip files across multiple media, they have a lot of issues. GNU tar s incremental mode is clunky and buggy; zip is even worse. tar files can t be read randomly, making it extremely time-consuming to extract just certain files out of a tar file.
The only thing going for these formats (and especially zip) is the wide compatibility for restoration.
dar
Here we start to get into the more interesting tools. Dar is, in my opinion, one of the best Linux tools that few people know about. Since I first wrote about dar in 2008, it s added some interesting new features; among them, binary deltas and cloud storage support. So, dar has quite a few interesting features that I make use of in other ways, and could also be quite helpful here:
Dar can both read and write files sequentially (streaming, like tar), or with random-access (quick seek to extract a subset without having to read the entire archive)
Dar can apply compression to individual files, rather than to the archive as a whole, faciliting both random access and resilience (corruption in one file doesn t invalidate all subsequent files). Dar also supports numerous compression algorithms including gzip, bzip2, xz, lzo, etc., and can omit compressing already-compressed files.
The end of each dar file contains a central directory (dar calls this a catalog). The catalog contains everything necessary to extract individual files from the archive quickly, as well as everything necessary to make a future incremental archive based on this one. Additionally, dar can make and work with isolated catalogs a file containing the catalog only, without data.
Dar can split the archive into multiple pieces called slices. This can best be done with fixed-size slices ( slice and first-slice options), which let the catalog regord the slice number and preserves random access capabilities. With the execute option, dar can easily wait for a given slice to be burned, etc.
Dar normally stores an entire new copy of a modified file, but can optionally store an rdiff binary delta instead. This has the potential to be far smaller (think of a case of modifying metadata for a photo, for instance).
Additionally, dar comes with a dar_manager program. dar_manager makes a database out of dar catalogs (or archives). This can then be used to identify the precise archive containing a particular version of a particular file.
All this combines to make a useful system for archiving. Isolated catalogs are tiny, and it would be easy enough to include the isolated catalogs for the entire set of archives that came before (or even the dar_manager database file) with each new incremental archive. This would make restoration of a particular subset easy.
The main thing to address with dar is that you do need dar to extract the archive. Every dar release comes with source code and a win64 build. dar also supports building a statically-linked Linux binary. It would therefore be easy to include win64 binary, Linux binary, and source with every archive run. dar is also a part of multiple Linux and BSD distributions, which are archived around the Internet. I think this provides a reasonable future-proofing to make sure dar archives will still be readable in the future.
The other challenge is user ability. While dar is highly portable, it is fundamentally a CLI tool and will require CLI abilities on the part of users. I suspect, though, that I could write up a few pages of instructions to include and make that a reasonably easy process. Not everyone can use a CLI, but I would expect a person that could follow those instructions could be readily-enough found.
One other benefit of dar is that it could easily be used with tapes. The LTO series is liked by various hobbyists, though it could pose formidable obstacles to non-hobbyists trying to aceess data in future decades. Additionally, since the archive is a big file, it lends itself to working with par2 to provide redundancy for certain amounts of data corruption.
git-annex
git-annex is an interesting program that is designed to facilitate managing large sets of data and moving it between repositories. git-annex has particular support for offline archive drives and tracks which drives contain which files.
The idea would be to store the data to be archived in a git-annex repository. Then git-annex commands could generate filesystem trees on the external drives (or trees to br burned to read-only media).
In a post about using git-annex for blu-ray backups, an earlier thread about DVD-Rs was mentioned.
This has a few interesting properties. For one, with due care, the files can be stored on archival media as regular files. There are some different options for how to generate the archives; some of them would place the entire git-annex metadata on each drive/disc. With that arrangement, one could access the individual files without git-annex. With git-annex, one could reconstruct the final (or any intermediate) state of the archive appropriately, handling deltions, renames, etc. You would also easily be able to know where copies of your files are.
The practice is somewhat more challenging. Hundreds of thousands of files what I would consider a medium-sized archive can pose some challenges, running into hours-long execution if used in conjunction with the directory special remote (but only minutes-long with a standard git-annex repo).
Ruling out the directory special remote, I had thought I could maybe just work with my files in git-annex directly. However, I ran into some challenges with that approach as well. I am uncomfortable with git-annex mucking about with hard links in my source data. While it does try to preserve timestamps in the source data, these are lost on the clones. I wrote up my best effort to work around all this.
In a forum post, the author of git-annex comments that I don t think that CDs/DVDs are a particularly good fit for git-annex, but it seems a couple of users have gotten something working. The page he references is Managing a large number of files archived on many pieces of read-only medium. Some of that discussion is a bit dated (for instance, the directory special remote has the importtree feature that implements what was being asked for there), but has some interesting tips.
git-annex supplies win64 binaries, and git-annex is included with many distributions as well. So it should be nearly as accessible as dar in the future. Since git-annex would be required to restore a consistent recovery image, similar caveats as with dar apply; CLI experience would be needed, along with some written instructions.
Bacula and BareOS
Although primarily tape-based archivers, these do also also nominally support drives and optical media. However, they are much more tailored as backup tools, especially with the ability to pull from multiple machines. They require a database and extensive configuration, making them a poor fit for both the creation and future extractability of this project.
Conclusions
I m going to spend some more time with dar and git-annex, testing them out, and hope to write some future posts about my experiences.
Docker and other container systems by default restrict access to devices on the host. They used to do this with cgroups with the cgroup v1 system, however, the second version of cgroups removed this controller and the man page says:
Cgroup v2 device controller has no interface files and is implemented on top of cgroup BPF.
That is just awesome, nothing to see here, go look at the BPF documents if you have cgroup v2.
With cgroup v1 if you wanted to know what devices were permitted, you just would cat /sys/fs/cgroup/XX/devices.allow and you were done!
The kernel documentation is not very helpful, sure its something in BPF and has something to do with the cgroup BPF specifically, but what does that mean?
There doesn t seem to be an easy corresponding method to get the same information. So to see what restrictions a docker container has, we will have to:
Find what cgroup the programs running in the container belong to
Find what is the eBPF program ID that is attached to our container cgroup
Dump the eBPF program to a text file
Try to interpret the eBPF syntax
The last step is by far the most difficult.
Finding a container s cgroup
All containers have a short ID and a long ID. When you run the docker ps command, you get the short id. To get the long id you can either use the --no-trunc flag or just guess from the short ID. I usually do the second.
$ docker ps
CONTAINER ID   IMAGE            COMMAND       CREATED          STATUS          PORTS     NAMES
a3c53d8aaec2   debian:minicom   "/bin/bash"   19 minutes ago   Up 19 minutes             inspiring_shannon
So the short ID is a3c53d8aaec2 and the long ID is a big ugly hex string starting with that. I generally just paste the relevant part in the next step and hit tab. For this container the cgroup is /sys/fs/cgroup/system.slice/docker-a3c53d8aaec23c256124f03d208732484714219c8b5f90dc1c3b4ab00f0b7779.scope/ Notice that the last directory has docker- then the short ID.
If you re not sure of the exact path. The /sys/fs/cgroup is the cgroup v2 mount point which can be found with mount -t cgroup2 and then rest is the actual cgroup name. If you know the process running in the container then the cgroup column in ps will show you.
eBPF programs and cgroups
Next we will need to get the eBPF program ID that is attached to our recently found cgroup. To do this, we will need to use the bpftool. One thing that threw me for a long time is when the tool talks about a program or a PROG ID they are talking about the eBPF programs, not your processes! With that out of the way, let s find the prog id.
$ sudo bpftool cgroup list /sys/fs/cgroup/system.slice/docker-a3c53d8aaec23c256124f03d208732484714219c8b5f90dc1c3b4ab00f0b7779.scope/
ID       AttachType      AttachFlags     Name
90       cgroup_device   multi
Our cgroup is attached to eBPF prog with ID of 90 and the type of program is cgroup _device.
Dumping the eBPF program
Next, we need to get the actual code that is run every time a process running in the cgroup tries to access a device. The program will take some parameters and will return either a 1 for yes you are allowed or a zero for permission denied. Don t use the file option as it dumps the program in binary format. The text version is hard enough to understand.
sudo bpftool prog dump xlated id 90 > myebpf.txt
Congratulations! You now have the eBPF program in a human-readable (?) format.
Interpreting the eBPF program
The eBPF format as dumped is not exactly user friendly. It probably helps to first go and look at an example program to see what is going on. You ll see that the program splits type (lower 4 bytes) and access (higher 4 bytes) and then does comparisons on those values. The eBPF has something similar:
What we find is that once we get past the first few lines filtering the given value that the comparison lines have:
r2 is the device type, 1 is block, 2 is character.
r3 is the device access, it s used with r1 for comparisons after masking the relevant bits. mknod, read and write are 1,2 and 3 respectively.
r4 is the major number
r5 is the minor number
For a even pretty simple setup, you are going to have around 60 lines of eBPF code to look at. Luckily, you ll often find the lines for the command options you added will be near the end, which makes it easier. For example:
This is a container using the option --device-cgroup-rule='c 100:42 rwm'. It is checking if r2 (device type) is 2 (char) and r4 (major device number) is 0x64 or 100 and r5 (minor device number) is 0x2a or 42. If any of those are not true, move to the next section, otherwise return with 1 (permit). We have all access modes permitted so it doesn t check for it.
The previous example has all permissions for our device with id 100:42, what about if we only want write access with the option --device-cgroup-rule='c 100:42 r'. The resulting eBPF is:
The code is almost the same but we are checking that w3 only has the second bit set, which is for reading, effectively checking for X==X&2. It s a cautious approach meaning no access still passes but multiple bits set will fail.
The device option
docker run allows you to specify files you want to grant access to your containers with the --device flag. This flag actually does two things. The first is to great the device file in the containers /dev directory, effectively doing a mknod command. The second thing is to adjust the eBPF program. If the device file we specified actually did have a major number of 100 and a minor of 42, the eBPF would look exactly like the above snippets.
What about privileged?
So we have used the direct cgroup options here, what does the --privileged flag do? This lets the container have full access to all the devices (if the user running the process is allowed). Like the --device flag, it makes the device files as well, but what does the filtering look like? We still have a cgroup but the eBPF program is greatly simplified, here it is in full:
Way back at DebConf16Gunnar managed to arrange for a number of Next Thing Co. C.H.I.P. boards to be distributed to those who were interested. I was lucky enough to be amongst those who received one, but I have to confess after some initial experimentation it ended up sitting in its box unused.
The reasons for that were varied; partly about not being quite sure what best to do with it, partly due to a number of limitations it had, partly because NTC sadly went insolvent and there was less momentum around the hardware. I ve always meant to go back to it, poking it every now and then but never completing a project. I m finally almost there, and I figure I should write some of it up.
TL;DR: My C.H.I.P. is currently running a mainline Linux 6.3 kernel with only a few DTS patches, an upstream u-boot v2022.1 with a couple of minor patches and an unmodified Debian bullseye armhf userspace.
Storage
The main issue with the C.H.I.P. is that it uses MLC NAND, in particular mine has an 8MB H27QCG8T2E5R. That ended up unsupported in Linux, with the UBIFS folk disallowing operation on MLC devices. There s been subsequent work to enable an SLC emulation mode which makes the device more reliable at the cost of losing capacity by pairing up writes/reads in cells (AFAICT). Some of this hit for the H27UCG8T2ETR in 5.16 kernels, but I definitely did some experimentation with 5.17 without having much success. I should maybe go back and try again, but I ended up going a different route.
It turned out that BytePorter had documented how to add a microSD slot to the NTC C.H.I.P., using just a microSD to full SD card adapter. Every microSD card I buy seems to come with one of these, so I had plenty lying around to test with. I started with ensuring the kernel could see it ok (by modifying the device tree), but once that was all confirmed I went further and built a more modern u-boot that talked to the SD card, and defaulted to booting off it. That meant no more relying on the internal NAND at all!
I do see some flakiness with the SD card, which is possibly down to the dodgy way it s hooked up (I should probably do a basic PCB layout with JLCPCB instead). That s mostly been mitigated by forcing it into 1-bit mode instead of 4-bit mode (I tried lowering the frequency too, but that didn t make a difference).
The problem manifests as:
sunxi-mmc 1c11000.mmc: data error, sending stop command
and then all storage access freezing (existing logins still work, if the program you re trying to run is in cache). I can t find a conclusive software solution to this; I m pretty sure it s the hardware, but I don t understand why the recovery doesn t generally work.
Random power offs
After I had storage working I d see random hangs or power offs. It wasn t quite clear what was going on. So I started trying to work out how to find out the CPU temperature, in case it was overheating. It turns out the temperature sensor on the R8 is part of the touchscreen driver, and I d taken my usual approach of turning off all the drivers I didn t think I d need. Enabling it (CONFIG_TOUCHSCREEN_SUN4I) gave temperature readings and seemed to help somewhat with stability, though not completely.
Next I ended up looking at the AXP209 PMIC. There were various scripts still installed (I d started out with the NTC Debian install and slowly upgraded it to bullseye while stripping away the obvious pieces I didn t need) and a start-up script called enable-no-limit. This turned out to not be running (some sort of expectation of i2c-dev being loaded and another failing check), but looking at the script and the data sheet revealed the issue.
The AXP209 can cope with 3 power sources; an external DC source, a Li-battery, and finally a USB port. I was powering my board via the USB port, using a charger rated for 2A. It turns out that the AXP209 defaults to limiting USB current to 900mA, and that with wifi active and the CPU busy the C.H.I.P. can rise above that. At which point the AXP shuts everything down. Armed with that info I was able to understand what the power scripts were doing and which bit I needed - i2cset -f -y 0 0x34 0x30 0x03 to set no limit and disable the auto-power off. Additionally I also discovered that the AXP209 had a built in temperature sensor as well, so I added support for that via iio-hwmon.
WiFi
WiFi on the C.H.I.P. is provided by an RTL8723BS SDIO attached device. It s terrible (and not just here, I had an x86 based device with one where it also sucked). Thankfully there s a driver in staging in the kernel these days, but I ve still found it can fall out with my house setup, end up connecting to a further away AP which then results in lots of retries, dropped frames and CPU consumption. Nailing it to the AP on the other side of the wall from where it is helps. I haven t done any serious testing with the Bluetooth other than checking it s detected and can scan ok.
Patches
I patched u-boot v2022.01 (which shows you how long ago I was trying this out) with the following to enable boot from external SD:
u-boot C.H.I.P. external SD patch
I ve sent some patches for the kernel device tree upstream - there s an outstanding issue with the Bluetooth wake GPIO causing the serial port not to probe(!) that I need to resolve before sending a v2, but what s there works for me.
The only remaining piece is patch to enable the external SD for Linux; I don t think it s appropriate to send upstream but it s fairly basic. This limits the bus to 1 bit rather than the 4 bits it s capable of, as mentioned above.
Linux C.H.I.P. external SD DTS patch
diff
diff --git a/arch/arm/boot/dts/sun5i-r8-chip.dts b/arch/arm/boot/dts/sun5i-r8-chip.dts
index fd37bd1f3920..2b5aa4952620 100644
--- a/arch/arm/boot/dts/sun5i-r8-chip.dts
+++ b/arch/arm/boot/dts/sun5i-r8-chip.dts
@@ -163,6 +163,17 @@ &mmc0
status = "okay";
;
+&mmc2
+ pinctrl-names = "default";
+ pinctrl-0 = <&mmc2_4bit_pe_pins>;
+ vmmc-supply = <®_vcc3v3>;
+ vqmmc-supply = <®_vcc3v3>;
+ bus-width = <1>;
+ non-removable;
+ disable-wp;
+ status = "okay";
+ ;
+
&ohci0
status = "okay";
;
As for what I m doing with it, I think that ll have to be a separate post.
Probably everyone is familiar with a regular VPN. The traditional use case is to connect to a corporate or home network from a remote location, and access services as if you were there.
But these days, the notion of corporate network and home network are less based around physical location. For instance, a company may have no particular office at all, may have a number of offices plus a number of people working remotely, and so forth. A home network might have, say, a PVR and file server, while highly portable devices such as laptops, tablets, and phones may want to talk to each other regardless of location. For instance, a family member might be traveling with a laptop, another at a coffee shop, and those two devices might want to communicate, in addition to talking to the devices at home.
And, in both scenarios, there might be questions about giving limited access to friends. Perhaps you d like to give a friend access to part of your file server, or as a company, you might have contractors working on a limited project.
Pretty soon you wind up with a mess of VPNs, forwarded ports, and tricks to make it all work. With the increasing prevalence of CGNAT, a lot of times you can t even open a port to the public Internet. Each application or device probably has its own gateway just to make it visible on the Internet, some of which you pay for.
Then you add on the question of: should you really trust your LAN anyhow? With possibilities of guests using it, rogue access points, etc., the answer is probably no .
We can move the responsibility for dealing with NAT, fluctuating IPs, encryption, and authentication, from the application layer further down into the network stack. We then arrive at a much simpler picture for all.
So this page is fundamentally about making the network work, simply and effectively.
How do we make the Internet work in these scenarios?
We re going to combine three concepts:
A VPN, providing fully encrypted and authenticated communication and stable IPs
Mesh Networking, in which devices automatically discover optimal paths to reach each other
Zero-trust networking, in which we do not need to trust anything about the underlying LAN, because all our traffic uses the secure systems in points 1 and 2.
By combining these concepts, we arrive at some nice results:
You can ssh hostname, where hostname is one of your machines (server, laptop, whatever), and as long as hostname is up, you can reach it, wherever it is, wherever you are.
Combined with mosh, these sessions will be durable even across moving to other host networks.
You could just as well use telnet, because the underlying network should be secure.
You don t have to mess with encryption keys, certs, etc., for every internal-only service. Since IPs are now trustworthy, that s all you need. hosts.allow could make a comeback!
You have a way of transiting out of extremely restrictive networks. Every tool discussed here has a way of falling back on routing things via a broker (relay) on TCP port 443 if all else fails.
There might sometimes be tradeoffs. For instance:
On LANs faster than 1Gbps, performance may degrade due to encryption and encapsulation overhead. However, these tools should let hosts discover the locality of each other and not send traffic over the Internet if the devices are local.
With some of these tools, hosts local to each other (on the same LAN) may be unable to find each other if they can t reach the control plane over the Internet (Internet is down or provider is down)
Some other features that some of the tools provide include:
Easy sharing of limited access with friends/guests
Taking care of everything you need, including SSL certs, for exposing a certain on-net service to the public Internet
Optional routing of your outbound Internet traffic via an exit node on your network. Useful, for instance, if your local network is blocking tons of stuff.
Let s dive in.
Types of Mesh VPNs
I ll go over several types of meshes in this article:
Fully decentralized with automatic hop routing
This model has no special central control plane. Nodes discover each other in various ways, and establish routes to each other. These routes can be direct connections over the Internet, or via other nodes. This approach offers the greatest resilience. Examples I ll cover include Yggdrasil and tinc.
Automatic peer-to-peer with centralized control
In this model, nodes, by default, communicate by establishing direct links between them. A regular node never carries traffic on behalf of other nodes. Special-purpose relays are used to handle cases in which NAT traversal is impossible. This approach tends to offer simple setup. Examples I ll cover include Tailscale, Zerotier, Nebula, and Netmaker.
Roll your own and hybrid approaches
This is a grab bag of other ideas; for instance, running Yggdrasil over Tailscale.
Terminology
For the sake of consistency, I m going to use common language to discuss things that have different terms in different ecosystems:
Every tool discussed here has a way of dealing with NAT traversal. It may assist with establishing direct connections (eg, STUN), and if that fails, it may simply relay traffic between nodes. I ll call such a relay a broker . This may or may not be the same system that is a control plane for a tool.
All of these systems operate over lower layers that are unencrypted. Those lower layers may be a LAN (wired or wireless, which may or may not have Internet access), or the public Internet (IPv4 and/or IPv6). I m going to call the unencrypted lower layer, whatever it is, the clearnet .
Evaluation Criteria
Here are the things I want to see from a solution:
Secure, with all communications end-to-end encrypted and authenticated, and prevention of traffic from untrusted devices.
Flexible, adapting to changes in network topology quickly and automatically.
Resilient, without single points of failure, and with devices local to each other able to communicate even if cut off from the Internet or other parts of the network.
Private, minimizing leakage of information or metadata about me and my systems
Able to traverse CGNAT without having to use a broker whenever possible
A lesser requirement for me, but still a nice to have, is the ability to include others via something like Internet publishing or inviting guests.
Fully or nearly fully Open Source
Free or very cheap for personal use
Wide operating system support, including headless Linux on x86_64 and ARM.
Fully Decentralized VPNs with Automatic Hop Routing
Two systems fit this description: Yggdrasil and Tinc. Let s dive in.
Yggdrasil
I ll start with Yggdrasil because I ve written so much about it already. It featured in prior posts such as:
Yggdrasil can be a private mesh VPN, or something more
Yggdrasil can be a private mesh VPN, just like the other tools covered here. It s unique, however, in that a key goal of the project is to also make it useful as a planet-scale global mesh network. As such, Yggdrasil is a testbed of new ideas in distributed routing designed to scale up to massive sizes and all sorts of connection conditions. As of 2023-04-10, the main global Yggdrasil mesh has over 5000 nodes in it. You can choose whether or not to participate.
Every node in a Yggdrasil mesh has a public/private keypair. Each node then has an IPv6 address (in a private address space) derived from its public key. Using these IPv6 addresses, you can communicate right away.
Yggdrasil differs from most of the other tools here in that it does not necessarily seek to establish a direct link on the clearnet between, say, host A and host G for them to communicate. It will prefer such a direct link if it exists, but it is perfectly happy if it doesn t.
The reason is that every Yggdrasil node is also a router in the Yggdrasil mesh. Let s sit with that concept for a moment. Consider:
If you have a bunch of machines on your LAN, but only one of them can peer over the clearnet, that s fine; all the other machines will discover this route to the world and use it when necessary.
All you need to run a broker is just a regular node with a public IP address. If you are participating in the global mesh, you can use one (or more) of the free public peers for this purpose.
It is not necessary for every node to know about the clearnet IP address of every other node (improving privacy). In fact, it s not even necessary for every node to know about the existence of all the other nodes, so long as it can find a route to a given node when it s asked to.
Yggdrasil can find one or more routes between nodes, and it can use this knowledge of multiple routes to aggressively optimize for varying network conditions, including combinations of, say, downloads and low-latency ssh sessions.
Behind the scenes, Yggdrasil calculates optimal routes between nodes as necessary, using a mesh-wide DHT for initial contact and then deriving more optimal paths. (You can also read more details about the routing algorithm.)
One final way that Yggdrasil is different from most of the other tools is that there is no separate control server. No node is special , in charge, the sole keeper of metadata, or anything like that. The entire system is completely distributed and auto-assembling.
Meeting neighbors
There are two ways that Yggdrasil knows about peers:
By broadcast discovery on the local LAN
By listening on a specific port (or being told to connect to a specific host/port)
Sometimes this might lead to multiple ways to connect to a node; Yggdrasil prefers the connection auto-discovered by broadcast first, then the lowest-latency of the defined path. In other words, when your laptops are in the same room as each other on your local LAN, your packets will flow directly between them without traversing the Internet.
Unique uses
Yggdrasil is uniquely suited to network-challenged situations. As an example, in a post-disaster situation, Internet access may be unavailable or flaky, yet there may be many local devices perhaps ones that had never known of each other before that could share information. Yggdrasil meets this situation perfectly. The combination of broadcast auto-detection, distributed routing, and so forth, basically means that if there is any physical path between two nodes, Yggdrasil will find and enable it.
Ad-hoc wifi is rarely used because it is a real pain. Yggdrasil actually makes it useful! Its broadcast discovery doesn t require any IP address provisioned on the interface at all (it just uses the IPv6 link-local address), so you don t need to figure out a DHCP server or some such. And, Yggdrasil will tend to perform routing along the contours of the RF path. So you could have a laptop in the middle of a long distance relaying communications from people farther out, because it could see both. Or even a chain of such things.
Yggdrasil: Security and Privacy
Yggdrasil s mesh is aggressively greedy. It will peer with any node it can find (unless told otherwise) and will find a route to anywhere it can. There are two main ways to make sure you keep unauthorized traffic out: by restricting who can talk to your mesh, and by firewalling the Yggdrasil interface. Both can be used, and they can be used simultaneously.
I ll discuss firewalling more at the end of this article. Basically, you ll almost certainly want to do this if you participate in the public mesh, because doing so is akin to having a globally-routable public IP address direct to your device.
If you want to restrict who can talk to your mesh, you just disable the broadcast feature on all your nodes (empty MulticastInterfaces section in the config), and avoid telling any of your nodes to connect to a public peer. You can set a list of authorized public keys that can connect to your nodes listening interfaces, which you ll probably want to do. You will probably want to either open up some inbound ports (if you can) or set up a node with a known clearnet IP on a place like a $5/mo VPS to help with NAT traversal (again, setting AllowedPublicKeys as appropriate). Yggdrasil doesn t allow filtering multicast clients by public key, only by network interface, so that s why we disable broadcast discovery. You can easily enough teach Yggdrasil about static internal LAN IPs of your nodes and have things work that way. (Or, set up an internal gateway node or two, that the clients just connect to when they re local). But fundamentally, you need to put a bit more thought into this with Yggdrasil than with the other tools here, which are closed-only.
Compared to some of the other tools here, Yggdrasil is better about information leakage; nodes only know details, such as clearnet IPs, of directly-connected peers. You can obtain the list of directly-connected peers of any known node in the mesh but that list is the public keys of the directly-connected peers, not the clearnet IPs.
Some of the other tools contain a limited integrated firewall of sorts (with limited ACLs and such). Yggdrasil does not, but is fully compatible with on-host firewalls. I recommend these anyway even with many other tools.
Yggdrasil: Connectivity and NAT traversal
Compared to the other tools, Yggdrasil is an interesting mix. It provides a fully functional mesh and facilitates connectivity in situations in which no other tool can. Yet its NAT traversal, while it exists and does work, results in using a broker under some of the more challenging CGNAT situations more often than some of the other tools, which can impede performance.
Yggdrasil s underlying protocol is TCP-based. Before you run away screaming that it must be slow and unreliable like OpenVPN over TCP it s not, and it is even surprisingly good around bufferbloat. I ve found its performance to be on par with the other tools here, and it works as well as I d expect even on flaky 4G links.
Overall, the NAT traversal story is mixed. On the one hand, you can run a node that listens on port 443 and Yggdrasil can even make it speak TLS (even though that s unnecessary from a security standpoint), so you can likely get out of most restrictive firewalls you will ever encounter. If you join the public mesh, know that plenty of public peers do listen on port 443 (and other well-known ports like 53, plus random high-numbered ones).
If you connect your system to multiple public peers, there is a chance though a very small one that some public transit traffic might be routed via it. In practice, public peers hopefully are already peered with each other, preventing this from happening (you can verify this with yggdrasilctl debug_remotegetpeers key=ABC...). I have never experienced a problem with this. Also, since latency is a factor in routing for Yggdrasil, it is highly unlikely that random connections we use are going to be competitive with datacenter peers.
Yggdrasil: Sharing with friends
If you re open to participating in the public mesh, this is one of the easiest things of all. Have your friend install Yggdrasil, point them to a public peer, give them your Yggdrasil IP, and that s it. (Well, presumably you also open up your firewall you did follow my advice to set one up, right?)
If your friend is visiting at your location, they can just hop on your wifi, install Yggdrasil, and it will automatically discover a route to you. Yggdrasil even has a zero-config mode for ephemeral nodes such as certain Docker containers.
Yggdrasil doesn t directly support publishing to the clearnet, but it is certainly possible to proxy (or even NAT) to/from the clearnet, and people do.
Yggdrasil: DNS
There is no particular extra DNS in Yggdrasil. You can, of course, run a DNS server within Yggdrasil, just as you can anywhere else. Personally I just add relevant hosts to /etc/hosts and leave it at that, but it s up to you.
Yggdrasil: Source code, pricing, and portability
Yggdrasil is fully open source (LGPLv3 plus additional permissions in an exception) and highly portable. It is written in Go, and has prebuilt binaries for all major platforms (including a Debian package which I made).
There is no charge for anything with Yggdrasil. Listed public peers are free and run by volunteers. You can run your own peers if you like; they can be public and unlisted, public and listed (just submit a PR to get it listed), or private (accepting connections only from certain nodes keys). A peer in this case is just a node with a known clearnet IP address.
Yggdrasil encourages use in other projects. For instance, NNCP integrates a Yggdrasil node for easy communication with other NNCP nodes.
Yggdrasil conclusions
Yggdrasil is tops in reliability (having no single point of failure) and flexibility. It will maintain opportunistic connections between peers even if the Internet is down.
The unique added feature of being able to be part of a global mesh is a nice one.
The tradeoffs include being more prone to need to use a broker in restrictive CGNAT environments. Some other tools have clients that override the OS DNS resolver to also provide resolution of hostnames of member nodes; Yggdrasil doesn t, though you can certainly run your own DNS infrastructure over Yggdrasil (or, for that matter, let public DNS servers provide Yggdrasil answers if you wish).
There is also a need to pay more attention to firewalling or maintaining separation from the public mesh. However, as I explain below, many other options have potential impacts if the control plane, or your account for it, are compromised, meaning you ought to firewall those, too. Still, it may be a more immediate concern with Yggdrasil.
Although Yggdrasil is listed as experimental, I have been using it for over a year and have found it to be rock-solid. They did change how mesh IPs were calculated when moving from 0.3 to 0.4, causing a global renumbering, so just be aware that this is a possibility while it is experimental.
tinc
tinc is the oldest tool on this list; version 1.0 came out in 2003! You can think of tinc as something akin to an older Yggdrasil without the public option.
I will be discussing tinc 1.0.36, the latest stable version, which came out in 2019. The development branch, 1.1, has been going since 2011 and had its latest release in 2021. The last commit to the Github repo was in June 2022.
Tinc is the only tool here to support both tun and tap style interfaces. I go into the difference more in the Zerotier review below. Tinc actually provides a better tap implementation than Zerotier, with various sane options for broadcasts, but I still think the call for an Ethernet, as opposed to IP, VPN is small.
To configure tinc, you generate a per-host configuration and then distribute it to every tinc node. It contains a host s public key. Therefore, adding a host to the mesh means distributing its key everywhere; de-authorizing it means removing its key everywhere. This makes it rather unwieldy.
tinc can do LAN broadcast discovery and mesh routing, but generally speaking you must manually teach it where to connect initially. Somewhat confusingly, the examples all mention listing a public address for a node. This doesn t make sense for a laptop, and I suspect you d just omit it. I think that address is used for something akin to a Yggdrasil peer with a clearnet IP.
Unlike all of the other tools described here, tinc has no tool to inspect the running state of the mesh.
Some of the properties of tinc made it clear I was unlikely to adopt it, so this review wasn t as thorough as that of Yggdrasil.
tinc: Security and Privacy
As mentioned above, every host in the tinc mesh is authenticated based on its public key. However, to be more precise, this key is validated only at the point it connects to its next hop peer. (To be sure, this is also the same as how the list of allowed pubkeys works in Yggdrasil.) Since IPs in tinc are not derived from their key, and any host can assign itself whatever mesh IP it likes, this implies that a compromised host could impersonate another.
It is unclear whether packets are end-to-end encrypted when using a tinc node as a router. The fact that they can be routed at the kernel level by the tun interface implies that they may not be.
tinc: Connectivity and NAT traversal
I was unable to find much information about NAT traversal in tinc, other than that it does support it. tinc can run over UDP or TCP and auto-detects which to use, preferring UDP.
tinc: Sharing with friends
tinc has no special support for this, and the difficulty of configuration makes it unlikely you d do this with tinc.
tinc: Source code, pricing, and portability
tinc is fully open source (GPLv2). It is written in C and generally portable. It supports some very old operating systems. Mobile support is iffy.
tinc does not seem to be very actively maintained.
tinc conclusions
I haven t mentioned performance in my other reviews (see the section at the end of this post). But, it is so poor as to only run about 300Mbps on my 2.5Gbps network. That s 1/3 the speed of Yggdrasil or Tailscale. Combine that with the unwieldiness of adding hosts and some uncertainties in security, and I m not going to be using tinc.
Automatic Peer-to-Peer Mesh VPNs with centralized control
These tend to be the options that are frequently discussed. Let s talk about the options.
Tailscale
Tailscale is a popular choice in this type of VPN. To use Tailscale, you first sign up on tailscale.com. Then, you install the tailscale client on each machine. On first run, it prints a URL for you to click on to authorize the client to your mesh ( tailnet ). Tailscale assigns a mesh IP to each system. The Tailscale client lets the Tailscale control plane gather IP information about each node, including all detectable public and private clearnet IPs.
When you attempt to contact a node via Tailscale, the client will fetch the known contact information from the control plane and attempt to establish a link. If it can contact over the local LAN, it will (it doesn t have broadcast autodetection like Yggdrasil; the information must come from the control plane). Otherwise, it will try various NAT traversal options. If all else fails, it will use a broker to relay traffic; Tailscale calls a broker a DERP relay server. Unlike Yggdrasil, a Tailscale node never relays traffic for another; all connections are either direct P2P or via a broker.
Tailscale, like several others, is based around Wireguard; though wireguard-go rather than the in-kernel Wireguard.
Tailscale has a number of somewhat unique features in this space:
Funnel, which lets you expose ports on your system to the public Internet via the VPN.
Exit nodes, which automate the process of routing your public Internet traffic over some other node in the network. This is possible with every tool mentioned here, but Tailscale makes switching it on or off a couple of quick commands away.
Node sharing, which lets you share a subset of your network with guests
Funnel, in particular, is interesting. With a couple of tailscale serve -style commands, you can expose a directory tree (or a development webserver) to the world. Tailscale gives you a public hostname, obtains a cert for it, and proxies inbound traffic to you. This is subject to some unspecified bandwidth limits, and you can only choose from three public ports, so it s not really a production solution but as a quick and easy way to demonstrate something cool to a friend, it s a neat feature.
Tailscale: Security and Privacy
With Tailscale, as with the other tools in this category, one of the main threats to consider is the control plane. What are the consequences of a compromise of Tailscale s control plane, or of the credentials you use to access it?
Let s begin with the credentials used to access it. Tailscale operates no identity system itself, instead relying on third parties. For individuals, this means Google, Github, or Microsoft accounts; Okta and other SAML and similar identity providers are also supported, but this runs into complexity and expense that most individuals aren t wanting to take on. Unfortunately, all three of those types of accounts often have saved auth tokens in a browser. Personally I would rather have a separate, very secure, login.
If a person does compromise your account or the Tailscale servers themselves, they can t directly eavesdrop on your traffic because it is end-to-end encrypted. However, assuming an attacker obtains access to your account, they could:
Tamper with your Tailscale ACLs, permitting new actions
Add new nodes to the network
Forcibly remove nodes from the network
Enable or disable optional features
Of note is that they cannot just commandeer an existing IP. I would say the riskiest possibility here is that could add new nodes to the mesh. Because they could also tamper with your ACLs, they could then proceed to attempt to access all your internal services. They could even turn on service collection and have Tailscale tell them what and where all the services are.
Therefore, as with other tools, I recommend a local firewall on each machine with Tailscale. More on that below.
Tailscale has a new alpha feature called tailnet lock which helps with this problem. It requires existing nodes in the mesh to sign a request for a new node to join. Although this doesn t address ACL tampering and some of the other things, it does represent a significant help with the most significant concern. However, tailnet lock is in alpha, only available on the Enterprise plan, and has a waitlist, so I have been unable to test it.
Any Tailscale node can request the IP addresses belonging to any other Tailscale node. The Tailscale control plane captures, and exposes to you, this information about every node in your network: the OS hostname, IP addresses and port numbers, operating system, creation date, last seen timestamp, and NAT traversal parameters. You can optionally enable service data capture as well, which sends data about open ports on each node to the control plane.
Tailscale likes to highlight their key expiry and rotation feature. By default, all keys expire after 180 days, and traffic to and from the expired node will be interrupted until they are renewed (basically, you re-login with your provider and do a renew operation). Unfortunately, the only mention I can see of warning of impeding expiration is in the Windows client, and even there you need to edit a registry key to get the warning more than the default 24 hours in advance. In short, it seems likely to cut off communications when it s most important. You can disable key expiry on a per-node basis in the admin console web interface, and I mostly do, due to not wanting to lose connectivity at an inopportune time.
Tailscale: Connectivity and NAT traversal
When thinking about reliability, the primary consideration here is being able to reach the Tailscale control plane. While it is possible in limited circumstances to reach nodes without the Tailscale control plane, it is a fairly brittle setup and notably will not survive a client restart. So if you use Tailscale to reach other nodes on your LAN, that won t work unless your Internet is up and the control plane is reachable.
Assuming your Internet is up and Tailscale s infrastructure is up, there is little to be concerned with. Your own comfort level with cloud providers and your Internet should guide you here.
Tailscale wrote a fantastic article about NAT traversal and they, predictably, do very well with it. Tailscale prefers UDP but falls back to TCP if needed. Broker (DERP) servers step in as a last resort, and Tailscale clients automatically select the best ones. I m not aware of anything that is more successful with NAT traversal than Tailscale. This maximizes the situations in which a direct P2P connection can be used without a broker.
I have found Tailscale to be a bit slow to notice changes in network topography compared to Yggdrasil, and sometimes needs a kick in the form of restarting the client process to re-establish communications after a network change. However, it s possible (maybe even probable) that if I d waited a bit longer, it would have sorted this all out.
Tailscale: Sharing with friends
I touched on the funnel feature earlier. The sharing feature lets you give an invite to an outsider. By default, a person accepting a share can make only outgoing connections to the network they re invited to, and cannot receive incoming connections from that network this makes sense. When sharing an exit node, you get a checkbox that lets you share access to the exit node as well. Of course, the person accepting the share needs to install the Tailnet client. The combination of funnel and sharing make Tailscale the best for ad-hoc sharing.
Tailscale: DNS
Tailscale s DNS is called MagicDNS. It runs as a layer atop your standard DNS taking over /etc/resolv.conf on Linux and provides resolution of mesh hostnames and some other features. This is a concept that is pretty slick.
It also is a bit flaky on Linux; dueling programs want to write to /etc/resolv.conf. I can t really say this is entirely Tailscale s fault; they document the problem and some workarounds.
I would love to be able to add custom records to this service; for instance, to override the public IP for a service to use the in-mesh IP. Unfortunately, that s not yet possible. However, MagicDNS can query existing nameservers for certain domains in a split DNS setup.
Tailscale: Source code, pricing, and portability
Tailscale is almost fully open source and the client is highly portable. The client is open source (BSD 3-clause) on open source platforms, and closed source on closed source platforms. The DERP servers are open source. The coordination server is closed source, although there is an open source coordination server called Headscale (also BSD 3-clause) made available with Tailscale s blessing and informal support. It supports most, but not all, features in the Tailscale coordination server.
Tailscale s pricing (which does not apply when using Headscale) provides a free plan for 1 user with up to 20 devices. A Personal Pro plan expands that to 100 devices for $48 per year - not a bad deal at $4/mo. A Community on Github plan also exists, and then there are more business-oriented plans as well. See the pricing page for details.
As a small note, I appreciated Tailscale s install script. It properly added Tailscale s apt key in a way that it can only be used to authenticate the Tailscale repo, rather than as a systemwide authenticator. This is a nice touch and speaks well of their developers.
Tailscale conclusions
Tailscale is tops in sharing and has a broad feature set and excellent documentation. Like other solutions with a centralized control plane, device communications can stop working if the control plane is unreachable, and the threat model of the control plane should be carefully considered.
Zerotier
Zerotier is a close competitor to Tailscale, and is similar to it in a lot of ways. So rather than duplicate all of the Tailscale information here, I m mainly going to describe how it differs from Tailscale.
The primary difference between the two is that Zerotier emulates an Ethernet network via a Linux tap interface, while Tailscale emulates a TCP/IP network via a Linux tun interface.
However, Zerotier has a number of things that make it be a somewhat imperfect Ethernet emulator. For one, it has a problem with broadcast amplification; the machine sending the broadcast sends it to all the other nodes that should receive it (up to a set maximum). I wouldn t want to have a lot of programs broadcasting on a slow link. While in theory this could let you run Netware or DECNet across Zerotier, I m not really convinced there s much call for that these days, and Zerotier is clearly IP-focused as it allocates IP addresses and such anyhow. Zerotier provides special support for emulated ARP (IPv4) and NDP (IPv6). While you could theoretically run Zerotier as a bridge, this eliminates the zero trust principle, and Tailscale supports subnet routers, which provide much of the same feature set anyhow.
A somewhat obscure feature, but possibly useful, is Zerotier s built-in support for multipath WAN for the public interface. This actually lets you do a somewhat basic kind of channel bonding for WAN.
Zerotier: Security and Privacy
The picture here is similar to Tailscale, with the difference that you can create a Zerotier-local account rather than relying on cloud authentication. I was unable to find as much detail about Zerotier as I could about Tailscale - notably I couldn t find anything about how sticky an IP address is. However, the configuration screen lets me delete a node and assign additional arbitrary IPs within a subnet to other nodes, so I think the assumption here is that if your Zerotier account (or the Zerotier control plane) is compromised, an attacker could remove a legit device, add a malicious one, and assign the previous IP of the legit device to the malicious one. I m not sure how to mitigate against that risk, as firewalling specific IPs is ineffective if an attacker can simply take them over. Zerotier also lacks anything akin to Tailnet Lock.
For this reason, I didn t proceed much further in my Zerotier evaluation.
Zerotier: Connectivity and NAT traversal
Like Tailscale, Zerotier has NAT traversal with STUN. However, it looks like it s more limited than Tailscale s, and in particular is incompatible with double NAT that is often seen these days. Zerotier operates brokers ( root servers ) that can do relaying, including TCP relaying. So you should be able to connect even from hostile networks, but you are less likely to form a P2P connection than with Tailscale.
Zerotier: Sharing with friends
I was unable to find any special features relating to this in the Zerotier documentation. Therefore, it would be at the same level as Yggdrasil: possible, maybe even not too difficult, but without any specific help.
Zerotier: DNS
Unlike Tailscale, Zerotier does not support automatically adding DNS entries for your hosts. Therefore, your options are approximately the same as Yggdrasil, though with the added option of pushing configuration pointing to your own non-Zerotier DNS servers to the client.
Zerotier: Source code, pricing, and portability
The client ZeroTier One is available on Github under a custom business source license which prevents you from using it in certain settings. This license would preclude it being included in Debian. Their library, libzt, is available under the same license. The pricing page mentions a community edition for self hosting, but the documentation is sparse and it was difficult to understand what its feature set really is.
The free plan lets you have 1 user with up to 25 devices. Paid plans are also available.
Zerotier conclusions
Frankly I don t see much reason to use Zerotier. The virtual Ethernet model seems to be a weird hybrid that doesn t bring much value. I m concerned about the implications of a compromise of a user account or the control plane, and it lacks a lot of Tailscale features (MagicDNS and sharing). The only thing it may offer in particular is multipath WAN, but that s esoteric enough and also solvable at other layers that it doesn t seem all that compelling to me. Add to that the strange license and, to me anyhow, I don t see much reason to bother with it.
Netmaker
Netmaker is one of the projects that is making noise these days. Netmaker is the only one here that is a wrapper around in-kernel Wireguard, which can make a performance difference when talking to peers on a 1Gbps or faster link. Also, unlike other tools, it has an ingress gateway feature that lets people that don t have the Netmaker client, but do have Wireguard, participate in the VPN. I believe I also saw a reference somewhere to nodes as routers as with Yggdrasil, but I m failing to dig it up now.
The project is in a bit of an early state; you can sign up for an upcoming closed beta with a SaaS host, but really you are generally pointed to self-hosting using the code in the github repo. There are community and enterprise editions, but it s not clear how to actually choose. The server has a bunch of components: binary, CoreDNS, database, and web server. It also requires elevated privileges on the host, in addition to a container engine. Contrast that to the single binary that some others provide.
It looks like releases are frequent, but sometimes break things, and have a somewhat more laborious upgrade processes than most.
I don t want to spend a lot of time managing my mesh. So because of the heavy needs of the server, the upgrades being labor-intensive, it taking over iptables and such on the server, I didn t proceed with a more in-depth evaluation of Netmaker. It has a lot of promise, but for me, it doesn t seem to be in a state that will meet my needs yet.
Nebula
Nebula is an interesting mesh project that originated within Slack, seems to still be primarily sponsored by Slack, but is also being developed by Defined Networking (though their product looks early right now). Unlike the other tools in this section, Nebula doesn t have a web interface at all. Defined Networking looks likely to provide something of a SaaS service, but for now, you will need to run a broker ( lighthouse ) yourself; perhaps on a $5/mo VPS.
Due to the poor firewall traversal properties, I didn t do a full evaluation of Nebula, but it still has a very interesting design.
Nebula: Security and Privacy
Since Nebula lacks a traditional control plane, the root of trust in Nebula is a CA (certificate authority). The documentation gives this example of setting it up:
So the cert contains your IP, hostname, and group allocation. Each host in the mesh gets your CA certificate, and the per-host cert and key generated from each of these steps.
This leads to a really nice security model. Your CA is the gatekeeper to what is trusted in your mesh. You can even have it airgapped or something to make it exceptionally difficult to breach the perimeter.
Nebula contains an integrated firewall. Because the ability to keep out unwanted nodes is so strong, I would say this may be the one mesh VPN you might consider using without bothering with an additional on-host firewall.
You can define static mappings from a Nebula mesh IP to a clearnet IP. I haven t found information on this, but theoretically if NAT traversal isn t required, these static mappings may allow Nebula nodes to reach each other even if Internet is down. I don t know if this is truly the case, however.
Nebula: Connectivity and NAT traversal
This is a weak point of Nebula. Nebula sends all traffic over a single UDP port; there is no provision for using TCP. This is an issue at certain hotel and other public networks which open only TCP egress ports 80 and 443.
I couldn t find a lot of detail on what Nebula s NAT traversal is capable of, but according to a certain Github issue, this has been a sore spot for years and isn t as capable as Tailscale.
You can designate nodes in Nebula as brokers (relays). The concept is the same as Yggdrasil, but it s less versatile. You have to manually designate what relay to use. It s unclear to me what happens if different nodes designate different relays. Keep in mind that this always happens over a UDP port.
Nebula: Sharing with friends
There is no particular support here.
Nebula: DNS
Nebula has experimental DNS support. In contrast with Tailscale, which has an internal DNS server on every node, Nebula only runs a DNS server on a lighthouse. This means that it can t forward requests to a DNS server that s upstream for your laptop s particular current location. Actually, Nebula s DNS server doesn t forward at all. It also doesn t resolve its own name.
The Nebula documentation makes reference to using multiple lighthouses, which you may want to do for DNS redundancy or performance, but it s unclear to me if this would make each lighthouse form a complete picture of the network.
Nebula: Source code, pricing, and portability
Nebula is fully open source (MIT). It consists of a single Go binary and configuration. It is fairly portable.
Nebula conclusions
I am attracted to Nebula s unique security model. I would probably be more seriously considering it if not for the lack of support for TCP and poor general NAT traversal properties. Its datacenter connectivity heritage does show through.
Roll your own and hybrid
Here is a grab bag of ideas:
Running Yggdrasil over Tailscale
One possibility would be to use Tailscale for its superior NAT traversal, then allow Yggdrasil to run over it. (You will need a firewall to prevent Tailscale from trying to run over Yggdrasil at the same time!) This creates a closed network with all the benefits of Yggdrasil, yet getting the NAT traversal from Tailscale.
Drawbacks might be the overhead of the double encryption and double encapsulation. A good Yggdrasil peer may wind up being faster than this anyhow.
Public VPN provider for NAT traversal
A public VPN provider such as Mullvad will often offer incoming port forwarding and nodes in many cities. This could be an attractive way to solve a bunch of NAT traversal problems: just use one of those services to get you an incoming port, and run whatever you like over that.
Be aware that a number of public VPN clients have a kill switch to prevent any traffic from egressing without using the VPN; see, for instance, Mullvad s. You ll need to disable this if you are running a mesh atop it.
Other
Combining with local firewalls
For most of these tools, I recommend using a local firewal in conjunction with them. I have been using firehol and find it to be quite nice. This means you don t have to trust the mesh, the control plane, or whatever. The catch is that you do need your mesh VPN to provide strong association between IP address and node. Most, but not all, do.
Performance
I tested some of these for performance using iperf3 on a 2.5Gbps LAN. Here are the results. All speeds are in Mbps.
Tool
iperf3 (default)
iperf3 -P 10
iperf3 -R
Direct (no VPN)
2406
2406
2764
Wireguard (kernel)
1515
1566
2027
Yggdrasil
892
1126
1105
Tailscale
950
1034
1085
Tinc
296
300
277
You can see that Wireguard was significantly faster than the other options. Tailscale and Yggdrasil were roughly comparable, and Tinc was terrible.
IP collisions
When you are communicating over a network such as these, you need to trust that the IP address you are communicating with belongs to the system you think it does. This protects against two malicious actor scenarios:
Someone compromises one machine on your mesh and reconfigures it to impersonate a more important one
Someone connects an unauthorized system to the mesh, taking over a trusted IP, and uses the privileges of the trusted IP to access resources
To summarize the state of play as highlighted in the reviews above:
Yggdrasil derives IPv6 addresses from a public key
tinc allows any node to set any IP
Tailscale IPs aren t user-assignable, but the assignment algorithm is unknown
Zerotier allows any IP to be allocated to any node at the control plane
I don t know what Netmaker does
Nebula IPs are baked into the cert and signed by the CA, but I haven t verified the enforcement algorithm
So this discussion really only applies to Yggdrasil and Tailscale. tinc and Zerotier lack detailed IP security, while Nebula expects IP allocations to be handled outside of the tool and baked into the certs (therefore enforcing rigidity at that level).
So the question for Yggdrasil and Tailscale is: how easy is it to commandeer a trusted IP?
Yggdrasil has a brief discussion of this. In short, Yggdrasil offers you both a dedicated IP and a rarely-used /64 prefix which you can delegate to other machines on your LAN. Obviously by taking the dedicated IP, a lot more bits are available for the hash of the node s public key, making collisions technically impractical, if not outright impossible. However, if you use the /64 prefix, a collision may be more possible. Yggdrasil s hashing algorithm includes some optimizations to make this more difficult. Yggdrasil includes a genkeys tool that uses more CPU cycles to generate keys that are maximally difficult to collide with.
Tailscale doesn t document their IP assignment algorithm, but I think it is safe to say that the larger subnet you use, the better. If you try to use a /24 for your mesh, it is certainly conceivable that an attacker could remove your trusted node, then just manually add the 240 or so machines it would take to get that IP reassigned. It might be a good idea to use a purely IPv6 mesh with Tailscale to minimize this problem as well.
So, I think the risk is low in the default configurations of both Yggdrasil and Tailscale (certainly lower than with tinc or Zerotier). You can drive the risk even lower with both.
Final thoughts
For my own purposes, I suspect I will remain with Yggdrasil in some fashion. Maybe I will just take the small performance hit that using a relay node implies. Or perhaps I will get clever and use an incoming VPN port forward or go over Tailscale.
Tailscale was the other option that seemed most interesting. However, living in a region with Internet that goes down more often than I d like, I would like to just be able to send as much traffic over a mesh as possible, trusting that if the LAN is up, the mesh is up.
I have one thing that really benefits from performance in excess of Yggdrasil or Tailscale: NFS. That s between two machines that never leave my LAN, so I will probably just set up a direct Wireguard link between them. Heck of a lot easier than trying to do Kerberos!
Finally, I wrote this intending to be useful. I dealt with a lot of complexity and under-documentation, so it s possible I got something wrong somewhere. Please let me know if you find any errors.
This blog post is a copy of a page on my website. That page may be periodically updated.
The workshop was aimed at beginners, working in DDTP/DDTSS.
Two days of a hands-on workshop via Jitsi.
In the following days, translation work continued independently, with team support.
Subscribers: 29
New contributors to DDPT/DDTSS: 22
Translations from new participants: 175
Revisions from new participants : 261
Our focus was to complete the descriptions of the 500 most popular packages
(popcon).
Although we were unable to reach 100% of the translation cycle, much of these
descriptions are in progress and with a little more work will be available to
the community.
The Brazilian Portuguese translation team
A oficina foi direcionada para iniciantes, usando o DDTP/DDTSS.
Dois dias de oficina m o-na-massa via Jitsi.
Nos dias seguintes, continuidade dos trabalho de tradu o de forma
independente, com o suporte da equipe.
Quantidade de pessoas inscritos(as): 29
Novos(as) contribuidores(as) no DDPT/DDTSS: 22
Tradu es dos(as) novos(as) participantes: 175
Revis es dos(as) novos(as) participantes : 261
Nosso foco era completar as descri es dos 500 pacotes mais populares (popcon).
Apesar de n o termos conseguido chegar 100% do ciclo de tradu o, grande parte
dessas descri es est o em andamento e com um pouco mais de trabalho estar o
dispon veis comunidade.
Agrade o aos( s) participantes pelas contribui es. As oficinas foram bem
movimentadas e, muito al m das tradu es em si, conversamos sobre diversas faces
da comunidade Debian. Esperamos ter ajudado aos( s) iniciantes a contribuir com o
projeto de maneira frequente.
Agrade o em especial ao Charles (charles) que ministrou um dos dias da oficina,
ao Paulo (phls) que sempre est a dando uma for a, e ao Fred Maranh o pelo seu
incans vel trabalho no DDTSS.
Equipe de tradu o do portugu s do Brasil
Version 3.2 of QSoas is out ! It is mostly a bug-fix release, fixing the computation mistake found in the eecr-relay wave shape fit, see the correction to our initial article in JACS. We strongly encourage all the users of the eecr-relay wave shape fit to upgrade, and, unfortunately, refit previously fitted data as the results might change. The other wave shape fits are not affected by the issue.
New features
In addition to this important bug fix, new possibilities have been added, including a way to make fits with partially global parameters using the new define-indexed-fit command, to pick the best parameters dataset-by-dataset within fit trajectories, but also a parameter space explorer trying all possible permutations of one or more sets of parameters, and the possibility to save the results of a command to a global ruby variable.
There are a lot of other new features, improvements and so on, look for the full list there.
About QSoas QSoas is a powerful open source data analysis program that focuses on flexibility and powerful fitting capacities. It is released under the GNU General Public License. It is described in Fourmond, Anal. Chem., 2016, 88 (10), pp 5050 5052. Current version is 3.2. You can download for free its source code or precompiled versions for MacOS and Windows there. Alternatively, you can clone from the GitHub repository.
Back in September last year I chose to back the StarFiveVisionFive 2 on Kickstarter. I don t have a particular use in mind for it, but I felt it was one of the first RISC-V systems that were relatively capable (mentally I have it as somewhere between a Raspberry Pi 3 + a Pi 4). In particular it s a quad 1.5GHz 64-bit RISC-V core with 8G RAM, USB3, GigE ethernet and a single M.2 PCIe slot. More than ample as a personal machine for playing around with RISC-V and doing local builds. I ended up paying 67 for the Early Bird variant (dual GigE ethernet rather than 1 x 100Mb and 1 x GigE). A couple of weeks ago I got an email with a tracking number and last week it finally turned up.
Being impatient the first thing I did was plug it into a monitor, connect up a keyboard, and power it on. Nothing except some flashing lights. Looking at the boot selector DIP switches suggested it was configured to boot from UART, so I flipped them to (what I thought was) the flash setting. It wasn t - turns out the ON marking on the switches represents logic 0 and it was correctly setup when I got it. I went to read the documentation which talked about writing an image to a MicroSD card, but also had details of the UART connection. Wanting to make sure the device was at least doing something before I actually tried an OS on it I hooked up a USB/serial dongle and powered the board up again. Success! U-Boot appeared and I could interact with it.
I went to the VisionFive2 Debian page and proceeded to torrent the Image-69 image, writing it to a MicroSD card and inserting it in the slot on the bottom of the board. It booted fine. I can t even tell you what graphical environment it booted up because I don t remember; it worked fine though (at 1080p, I ve seen reports that 4K screens will make it croak).
Poking around the image revealed that it s built off a snapshot.debian.org snapshot from 20220616T194833Z, which is a little dated at this point but I understand the rationale behind picking something that works and sticking with it. The kernel is of course a vendor special, based on 5.15.0. Further investigation revealed that the entire X/graphics stack is living in /usr/local, which isn t overly surprising; it s Imagination based. I was pleasantly surprised to discover there is work to upstream the Imagination support, but I m not planning to run the board with a monitor attached so it s not a high priority for me.
Having discovered all that I decided to see how well a clean Debian unstable install from Debian Ports would go. I had a spare Intel Optane lying around (it s a stupid 22110 M.2 which is too long for any machine I own), so I put it in the slot on the bottom of the board. To my surprise it Just Worked and was detected ok:
I created a single partition with an ext4 filesystem (initially tried btrfs, but the StarFive kernel doesn t support it), and kicked off a debootstrap with:
The u-boot setup has a convoluted set of vendor scripts that eventually ends up reading a /boot/extlinux/extlinux.conf config from /dev/mmcblk1p2, so I added an additional entry there using the StarFive kernel but pointing to the NVMe device for /. Made sure to set a root password (not that I ve been bitten by that before, too many times), and rebooted. Success! Well. Sort of. I hit a bunch of problems with having a getty running on ttyS0 as well as one running on hvc0. The second turns out to be a console device from the RISC-V SBI. I did a systemctl mask serial-getty@hvc0.service which made things a bit happier, but I was still seeing odd behaviour and output. Turned out I needed to reboot the initramfs as well; the StarFive one was using Plymouth and doing some other stuff that seemed to be confusing matters. An update-initramfs -k 5.15.0-starfive -c built me a new one and everything was happy.
Next problem; the StarFive kernel doesn t have IPv6 support. StarFive are good citizens and make their 5.15 kernel tree available, so I grabbed it, fed it the existing config, and tweaked some options (including adding IPV6 and SECCOMP, which chrony wanted). Slight hiccup when it turned out trying to do things like make sound modular caused it to fail to compile, and having to backport the fix that allowed the use of GCC 12 (as present in sid), but it got there. So I got cocky and tried to update it to the latest 5.15.94. A few manual merge fixups (which I may or may not have got right, but it compiles and boots for me), and success. Timings:
$ time make -j 4 bindeb-pkg
  [linux-image-5.15.94-00787-g1fbe8ac32aa8]
real	37m0.134s
user	117m27.392s
sys	6m49.804s
On the subject of kernels I am pleased to note that there are efforts to upstream the VisionFive 2 support, with what appears to be multiple members of StarFive engaging in multiple patch submission rounds. It s really great to see this and I look forward to being able to run an unmodified mainline kernel on my board.
Niggles? I have a few. The provided u-boot doesn t have NVMe support enabled, so at present I need to keep a MicroSD card to boot off, even though root is on an SSD. I m also seeing some errors in dmesg from the SSD:
It doesn t seem to cause any actual issues, and it could be the SSD, the 5.15 kernel or an actual hardware thing - I ll keep an eye on it (I will probably end up with a different SSD that actually fits, so that ll provide another data point).
More annoying is the temperature the CPU seems to run at. There s no heatsink or fan, just the metal heatspreader on top of the CPU, and in normal idle operation it sits at around 60 C. Compiling a kernel it hit 90 C before I stopped the job and sorted out some additional cooling in the form of a desk fan, which kept it as just over 30 C.
I haven t seen any actual stability problems, but I wouldn t want to run for any length of time like that. I ve ordered a heatsink and also realised that the board supports a Raspberry Pi style PoE Hat , so I ve got one of those that includes a fan ordered (I am a complete convert to PoE especially for small systems like this).
With the desk fan setup I ve been able to run the board for extended periods under load (I did a full recompile of the Debian 6.1.12-1 kernel package and it took about 10 hours). The M.2 slot is unfortunately only a single PCIe v2 lane, and my testing topped out at about 180MB/s. IIRC that is about half what the slot should be capable of, and less than a 10th of what the SSD can do. Ethernet testing with iPerf3 sustained about 941Mb/s, so basically maxing out the port. The board as a whole isn t going to set any speed records, but it s perfectly usable, and pretty impressive for the price point.
On the Debian side I ve not hit any surprises. There s work going on to move RISC-V to a proper release architecture, and I m hoping to be able to help out with that, but the version of unstable I installed from the ports infrastructure has looked just like any other Debian install. Which is what you want. And that pretty much sums up my overall experience of the VisionFive 2; it s not noticeably different than any other single board computer. That s a good thing, FWIW, and once the kernel support lands properly upstream (it ll be post 6.3 at least it seems) it ll be a boring mainline supported platform that just happens to be RISC-V.
This is the second part of how I build a read-only root setup for my router. You might want to read part 1 first, which covers the initial boot and general overview of how I tie the pieces together. This post will describe how I build the squashfs image that forms the main filesystem.
Most of the build is driven from a script, make-router, which I ll dissect below. It s highly tailored to my needs, and this is a fairly lengthy post, but hopefully the steps I describe prove useful to anyone trying to do something similar.
Breakdown of make-router
#!/bin/bash# Either rb3011 (arm) or rb5009 (arm64)#HOSTNAME="rb3011"HOSTNAME="rb5009"if["x$ HOSTNAME"=="xrb3011"];then
ARCH=armhf
elif["x$ HOSTNAME"=="xrb5009"];then
ARCH=arm64
else
echo"Unknown host: $ HOSTNAME"exit 1
fi
It s a bash script, and I allow building for either my RB3011 or RB5009, which means a different architecture (32 vs 64 bit). I run this script on my Pi 4 which means I don t have to mess about with QemuUserEmulation.
BASE_DIR=$(dirname$0)IMAGE_FILE=$(mktemp--tmpdir router.$ ARCH.XXXXXXXXXX.img)MOUNT_POINT=$(mktemp-p /mnt -d router.$ ARCH.XXXXXXXXXX)# Build and mount an ext4 image file to put the root file system indd if=/dev/zero bs=1 count=0 seek=1G of=$ IMAGE_FILE
mkfs -t ext4 $ IMAGE_FILE
mount -o loop $ IMAGE_FILE$ MOUNT_POINT
I build the image in a loopback ext4 file on tmpfs (my Pi4 is the 8G model), which makes things a bit faster.
# Add dpkg excludesmkdir-p$ MOUNT_POINT/etc/dpkg/dpkg.cfg.d/
cat<<EOF > $ MOUNT_POINT/etc/dpkg/dpkg.cfg.d/path-excludes
# Exclude docs
path-exclude=/usr/share/doc/*
# Only locale we want is English
path-exclude=/usr/share/locale/*
path-include=/usr/share/locale/en*/*
path-include=/usr/share/locale/locale.alias
# No man pages
path-exclude=/usr/share/man/*
EOF
Create a dpkg excludes config to drop docs, man pages and most locales before we even start the bootstrap.
Actually do the debootstrap step, including a bunch of extra packages that we want.
# Install mqtt-arpcp$ BASE_DIR/debs/mqtt-arp_1_$ ARCH.deb $ MOUNT_POINT/tmp
chroot$ MOUNT_POINT dpkg -i /tmp/mqtt-arp_1_$ ARCH.deb
rm$ MOUNT_POINT/tmp/mqtt-arp_1_$ ARCH.deb
# Frob the mqtt-arp config so it starts after mosquittosed-i-e's/After=.*/After=mosquitto.service/'$ MOUNT_POINT/lib/systemd/system/mqtt-arp.service
I haven t uploaded mqtt-arp to Debian, so I install a locally built package, and ensure it starts after mosquitto (the MQTT broker), given they re running on the same host.
# Frob watchdog so it starts earlier than multi-usersed-i-e's/After=.*/After=basic.target/'$ MOUNT_POINT/lib/systemd/system/watchdog.service
# Make sure the watchdog is poking the device filesed-i-e's/^#watchdog-device/watchdog-device/'$ MOUNT_POINT/etc/watchdog.conf
watchdog timeouts were particularly an issue on the RB3011, where the default timeout didn t give enough time to reach multiuser mode before it would reset the router. Not helpful, so alter the config to start it earlier (and make sure it s configured to actually kick the device file).
# Clean up docs + localesrm-r$ MOUNT_POINT/usr/share/doc/*rm-r$ MOUNT_POINT/usr/share/man/*for dir in$ MOUNT_POINT/usr/share/locale/*/;do
if["$ dir"!="$ MOUNT_POINT/usr/share/locale/en/"];then
rm-r$ dirfi
done
Clean up any docs etc that ended up installed.
# Set root password to rootecho"root:root"chroot$ MOUNT_POINT chpasswd
The only login method is ssh key to the root account though I suppose this allows for someone to execute a privilege escalation from a daemon user so I should probably randomise this. Does need to be known though so it s possible to login via the serial console for debugging.
There are config files that are easier to replace wholesale, some of which are specific to the hardware (e.g. related to network interfaces). See below for some more details.
# Build symlinks into flash for boot / modulesln-s /mnt/flash/lib/modules $ MOUNT_POINT/lib/modules
rmdir$ MOUNT_POINT/boot
ln-s /mnt/flash/boot $ MOUNT_POINT/boot
The kernel + its modules live outside the squashfs image, on the USB flash drive that the image lives on. That makes for easier kernel upgrades.
# Put our git revision into os-releaseecho-n"GIT_VERSION=">>$ MOUNT_POINT/etc/os-release
(cd$ BASE_DIR; git describe --tags)>>$ MOUNT_POINT/etc/os-release
Always helpful to be able to check the image itself for what it was built from.
# Add some stuff to root's .bashrccat<<EOF >> $ MOUNT_POINT/root/.bashrc
alias ls='ls -F --color=auto'
eval "\$(dircolors)"
case "\$TERM" in
xterm* rxvt*)
PS1="\\[\\e]0;\\u@\\h: \\w\a\\]\$PS1"
;;
*)
;;
esac
EOF
Just some niceties for when I do end up logging in.
# Save the installed package list offchroot$ MOUNT_POINT dpkg --get-selections> /tmp/wip-installed-packages
Save off the installed package list. This was particularly useful when trying to replicate the existing router setup and making sure I had all the important packages installed. It doesn t really serve a purpose now.
In terms of the config files I copy into /etc, shared across both routers are the following:
Breakdown of shared config
I recently got a new NVME drive. My plan was to create a fresh Debian install on an F2FS root partition with compression for maximum performance. As it turns out, this is not entirely trivil to accomplish.
For one, the Debian installer does not support F2FS (here is my attempt to add it from 2021).
And even if it did, grub does not support F2FS with the extra_attr flag that is required for compression support (at least as of grub 2.06).
Luckily, we can install Debian anyway with all these these shiny new features when we go the manual road with debootstrap and using systemd-boot as bootloader.
We can break down the process into several steps:
Warning: Playing around with partitions can easily result in data if you mess up! Make sure to double check your commands and create a data backup if you don t feel confident about the process.
Creating the partition partble
The first step is to create the GPT partition table on the new drive. There are several tools to do this, I recommend the ArchWiki page on this topic for details.
For simplicity I just went with the GParted since it has an easy GUI, but feel free to use any other tool.
The layout should look like this:
Type         Partition        Suggested size

EFI          /dev/nvme0n1p1           512MiB
Linux swap   /dev/nvme0n1p2             1GiB
Linux fs     /dev/nvme0n1p3        remainder
Notes:
The disk names are just an example and have to be adjusted for your system.
Don t set disk labels, they don t appear on the new install anyway and some UEFIs might not like it on your boot partition.
The size of the EFI partition can be smaller, in practive it s unlikely that you need more than 300 MiB. However some UEFIs might be buggy and if you ever want to install an additional kernel or something like memtest86+ you will be happy to have the extra space.
The swap partition can be omitted, it is not strictly needed. If you need more swap for some reason you can also add more using a swap file later (see ArchWiki page). If you know you want to use suspend-to-RAM, you want to increase the size to something more than the size of your memory.
If you used GParted, create the EFI partition as FAT32 and set the esp flag. For the root partition use ext4 or F2FS if available.
Creating and mounting the root partition
To create the root partition, we need to install the f2fs-tools first:
sudo apt install f2fs-tools
Now we can create the file system with the correct flags:
--arch sets the CPU architecture (see Debian Wiki).
--components sets the archive components, if you don t want non-free pacakges you might want to remove some entries here.
unstable is the Debian release, you might want to change that to testing or bookworm.
$DFS points to the mounting point of the root partition.
http://deb.debian.org/debian is the Debian mirror, you might want to set that to http://ftp.de.debian.org/debian or similar if you have a fast mirror in you area.
Chrooting into the system
Before we can chroot into the newly created system, we need to prepare and mount virtual kernel file systems. First create the directories:
Then bind-mount the directories from your system to the mount point of the new system:
sudo mount -v -B /dev $DFS/dev
sudo mount -v -B /dev/pts $DFS/dev/pts
sudo mount -v -B /proc $DFS/proc
sudo mount -v -B /sys $DFS/sys
sudo mount -v -B /run $DFS/run
sudo mount -v -B /sys/firmware/efi/efivars $DFS/sys/firmware/efi/efivars
As a last step, we need to mount the EFI partition:
sudo mount -v -B /dev/nvme0n1p1 $DFS/boot/efi
Now we can chroot into new system:
sudo chroot $DFS /bin/bash
Configure the base system
The first step in the chroot is setting the locales. We need this since we might leak the locales from our base system into the chroot and if this happens we get a lot of annoying warnings.
Now you have a fully functional Debian chroot! However, it is not bootable yet, so let s fix that.
Define static file system information
The first step is to make sure the system mounts all partitions on startup with the correct mount flags.
This is done in /etc/fstab (see ArchWiki page).
Open the file and change its content to:
# file system                               mount point   type   options                                                            dump   pass
# NVME efi partition
UUID=XXXX-XXXX                              /boot/efi     vfat   umask=0077                                                         0      0
# NVME swap
UUID=XXXXXXXX-XXXX-XXXX-XXXX-XXXXXXXXXXXX   none          swap   sw                                                                 0      0
# NVME main partition
UUID=XXXXXXXX-XXXX-XXXX-XXXX-XXXXXXXXXXXX   /             f2fs   compress_algorithm=zstd:6,compress_chksum,atgc,gc_merge,lazytime   0      1
You need to fill in the UUIDs for the partitions. You can use
ls -lAph /dev/disk/by-uuid/
to match the UUIDs to the more readable disk name under /dev.
Installing the kernel and bootloader
First install the systemd-boot and efibootmgr packages:
apt install systemd-boot efibootmgr
Now we can install the bootloader:
bootctl install --path=/boot/efi
You can verify the procedure worked with
efibootmgr -v
The next step is to install the kernel, you can find a fitting image with:
apt search linux-image-*
In my case:
apt install linux-image-amd64
After the installation of the kernel, apt will add an entry for systemd-boot automatically. Neat!
However, since we are in a chroot the current settings are not bootable.
The first reason is the boot partition, which will likely be the one from your current system.
To change that, navigate to /boot/efi/loader/entries, it should contain one config file.
When you open this file, it should look something like this:
title      Debian GNU/Linux bookworm/sid
version    6.1.0-3-amd64
machine-id 2967cafb6420ce7a2b99030163e2ee6a
sort-key   debian
options    root=PARTUUID=f81d4fae-7dec-11d0-a765-00a0c91e6bf6 ro systemd.machine_id=2967cafb6420ce7a2b99030163e2ee6a
linux      /2967cafb6420ce7a2b99030163e2ee6a/6.1.0-3-amd64/linux
initrd     /2967cafb6420ce7a2b99030163e2ee6a/6.1.0-3-amd64/initrd.img-6.1.0-3-amd64
The PARTUUID needs to point to the partition equivalent to /dev/nvme0n1p3 on your system. You can use
ls -lAph /dev/disk/by-partuuid/
to match the PARTUUIDs to the more readable disk name under /dev.
The second problem is the ro flag in options which tell the kernel to boot in read-only mode.
The default is rw, so you can just remove the ro flag.
Once this is fixed, the new system should be bootable. You can change the boot order with:
efibootmgr --bootorder
However, before we reboot we might add well add a user and install some basic software.
Welcome to the first report for 2023 from the Reproducible Builds project!
In these reports we try and outline the most important things that we have been up to over the past month, as well as the most important things in/around the community. As a quick recap, the motivation behind the reproducible builds effort is to ensure no malicious flaws can be deliberately introduced during compilation and distribution of the software that we run on our devices. As ever, if you are interested in contributing to the project, please visit our Contribute page on our website.
News
In a curious turn of events, GitHub first announced this month that the checksums of various Git archives may be subject to change, specifically that because:
the default compression for Git archives has recently changed. As result, archives downloaded from GitHub may have different checksums even though the contents are completely unchanged.
This change (which was brought up on our mailing list last October) would have had quite wide-ranging implications for anyone wishing to validate and verify downloaded archives using cryptographic signatures. However, GitHub reversed this decision, updating their original announcement with a message that We are reverting this change for now. More details to follow. It appears that this was informed in part by an in-depth discussion in the GitHub Community issue tracker.
The Bundesamt f r Sicherheit in der Informationstechnik (BSI) (trans: The Federal Office for Information Security ) is the agency in charge of managing computer and communication security for the German federal government. They recently produced a report that touches on attacks on software supply-chains (Supply-Chain-Angriff). (German PDF)
Contributor Seb35 updated our website to fix broken links to Tails Git repository [][], and Holger updated a large number of pages around our recent summit in Venice [][][][].
Noak J nsson has written an interesting paper entitled The State of Software Diversity in the Software Supply Chain of Ethereum Clients. As the paper outlines:
In this report, the software supply chains of the most popular Ethereum clients are cataloged and analyzed. The dependency graphs of Ethereum clients developed in Go, Rust, and Java, are studied. These client are Geth, Prysm, OpenEthereum, Lighthouse, Besu, and Teku. To do so, their dependency graphs are transformed into a unified format. Quantitative metrics are used to depict the software supply chain of the blockchain. The results show a clear difference in the size of the software supply chain required for the execution layer and consensus layer of Ethereum.
F-Droid & Android
There was a very large number of changes in the F-Droid and wider Android ecosystem this month:
On January 15th, a blog post entitled Towards a reproducible F-Droid was published on the F-Droid website, outlining the reasons why F-Droid signs published APKs with its own keys and how reproducible builds allow using upstream developers keys instead. In particular:
GitLab user Parwor discovered that the number of CPU cores can affect the reproducibility of .dex files. []
FC Stegerman also announced the 0.2.0 and 0.2.1 releases of reproducible-apk-tools, a suite of tools to help make .apk files reproducible. Several new subcommands and scripts were added, and a number of bugs were fixed as well [][]. They also updated the F-Droid website to improve the reproducibility-related documentation. [][]
A number of bugs related to reproducibility were discovered in Android itself. Firstly, the non-deterministic order of .zip entries in .apk files [] and then newline differences between building on Windows versus Linux that can make builds not reproducible as well. [] (Note that these links may require a Google account to view.)
Debian
As mentioned in last month s report, Vagrant Cascadian has been organising a series of online sprints in order to clear the huge backlog of reproducible builds patches submitted by performing NMUs (Non-Maintainer Uploads). During January, a sprint took place on the 10th, resulting in the following uploads:
During this sprint, Holger Levsen filed Debian bug #1028615 to request that the tracker.debian.org service display results of reproducible rebuilds, not just reproducible CI results.
Elsewhere in Debian, strip-nondeterminism is our tool to remove specific non-deterministic results from a completed build. This month, version 1.13.1-1 was uploaded to Debian unstable by Holger Levsen, including a fix by FC Stegerman (obfusk) to update a regular expression for the latest version of file(1) []. (#1028892)
Lastly, 65 reviews of Debian packages were added, 21 were updated and 35 were removed this month adding to our knowledge about identified issues.
Finally, an existing tool called rpmreproduce was (re-)discovered this month, which claims that given a buildinfo file from a RPM package, [it can] generate instructions for attempting to reproduce the binary packages built from the associated source and build information.
diffoscopediffoscope is our in-depth and content-aware diff utility. Not only can it locate and diagnose reproducibility issues, it can provide human-readable diffs from many kinds of binary formats. This month, Chris Lamb made the following changes to diffoscope, including preparing and uploading versions 231, 232, 233 and 234 to Debian:
No need for from __future__ import print_function import anymore. []
Comment and tidy the extras_require.json handling. []
Split inline Python code to generate test Recommends into a separate Python script. []
Update debian/tests/control after merging support for PyPDF support. []
Correctly catch segfaulting cd-iccdump binary. []
Drop some old debugging code. []
Allow ICC tests to (temporarily) fail. []
In addition, FC Stegerman (obfusk) made a number of changes, including:
Updating the test_text_proper_indentation test to support the latest version(s) of file(1). []
Use an extras_require.json file to store some build/release metadata, instead of accessing the internet. []
Updating an APK-related file(1) regular expression. []
Lastly, Sam James added support for PyPDF version 3 [] and Vagrant Cascadian updated a handful of tool references for GNU Guix. [][]
Upstream patches
The Reproducible Builds project attempts to fix as many currently-unreproducible packages as possible. This month, we wrote a large number of such patches, including:
Several patches for file(1) (which is used by reproducible builds tools like diffoscope and strip-nondeterminism) that improve detection of various file formats are now included in the Debian packaging. []
Testing framework
The Reproducible Builds project operates a comprehensive testing framework at tests.reproducible-builds.org in order to check packages and other artifacts for reproducibility. In January, the following changes were made by Holger Levsen:
Node changes:
Add three new nodes hosted at the Oregon State University Open Source Lab including integrating them into the DNS, maintenance and monitoring systems. [][][][][]
Debian-related changes:
Only keep diffoscope s HTML output (ie. no .json or .txt) for LTS suites and older in order to save diskspace on the Jenkins host. []
Re-create pbuilder base less frequently for the stretch, bookworm and experimental suites. []
OpenWrt-related changes:
Add gcc-multilib to OPENWRT_HOST_PACKAGES and install it on the nodes that need it. []
Detect more problems in the health check when failing to build OpenWrt. []
Misc changes:
Update the chroot-run script to correctly manage /dev and /dev/pts. [][][]
Update the Jenkins shell monitor script to collect disk stats less frequently [] and to include various directory stats. [][]
Update the real year in the configuration in order to be able to detect whether a node is running in the future or not. []
Bump copyright years in the default page footer. []
In addition, Christian Marangi submitted a patch to build OpenWrt packages with the V=s flag to enable debugging. []
If you are interested in contributing to the Reproducible Builds project, please visit the Contribute page on our website. You can get in touch with us via:
 I very, very nearly didn t make it to DebConf this year, I had a bad cold/flu for a few days before I left, and after a negative covid-19 test just minutes before my flight, I decided to take the plunge and travel.
This is just everything in chronological order, more or less, it s the only way I could write it.
I very, very nearly didn t make it to DebConf this year, I had a bad cold/flu for a few days before I left, and after a negative covid-19 test just minutes before my flight, I decided to take the plunge and travel.
This is just everything in chronological order, more or less, it s the only way I could write it.
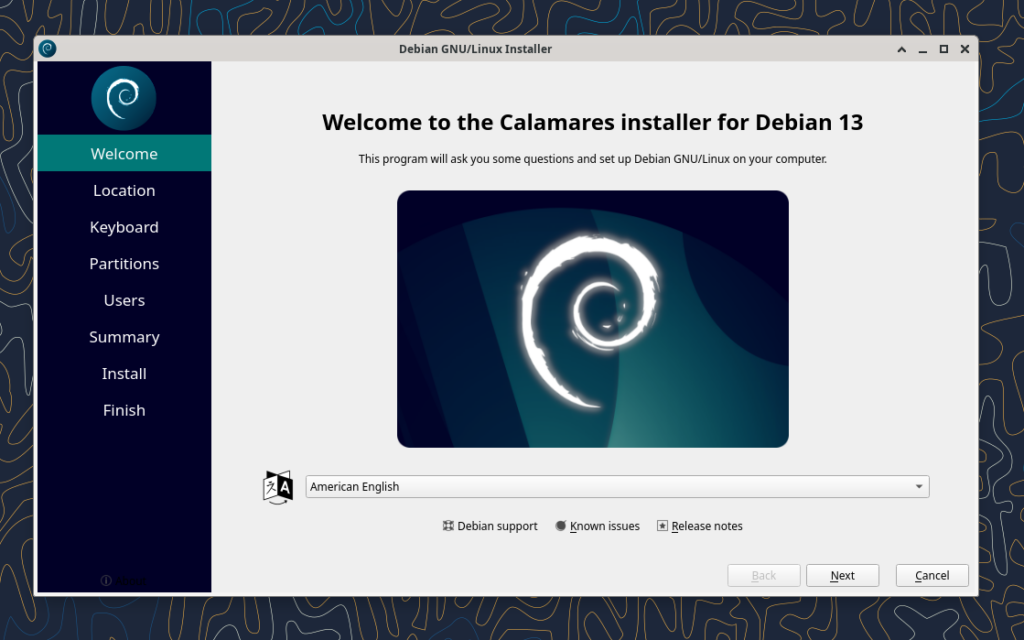

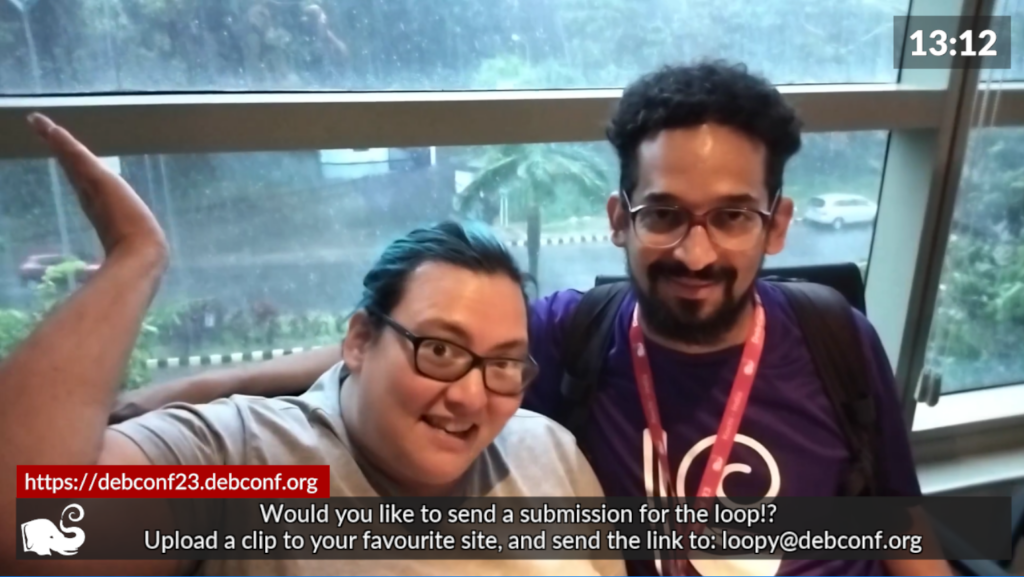
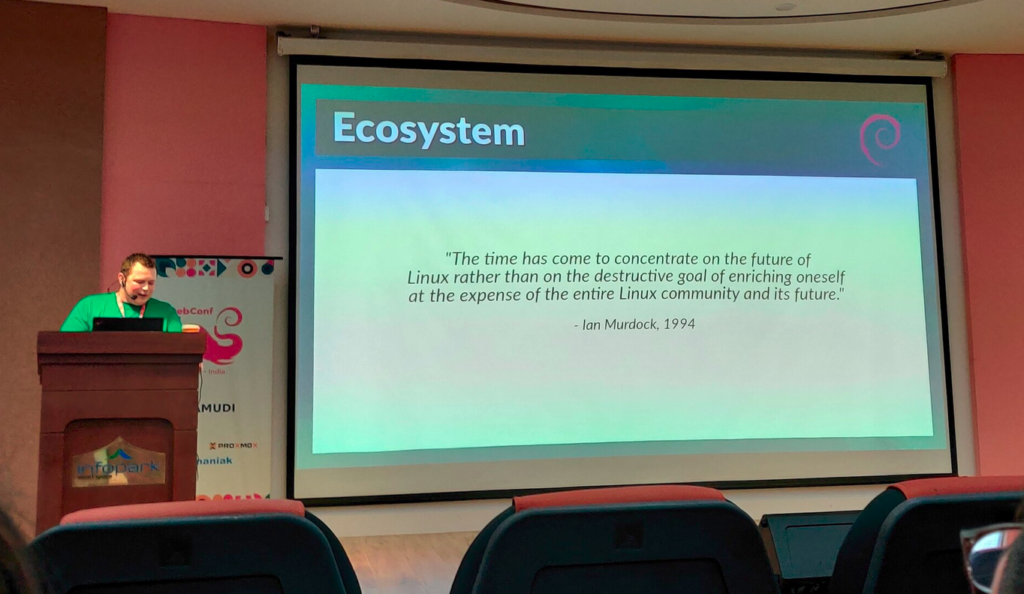


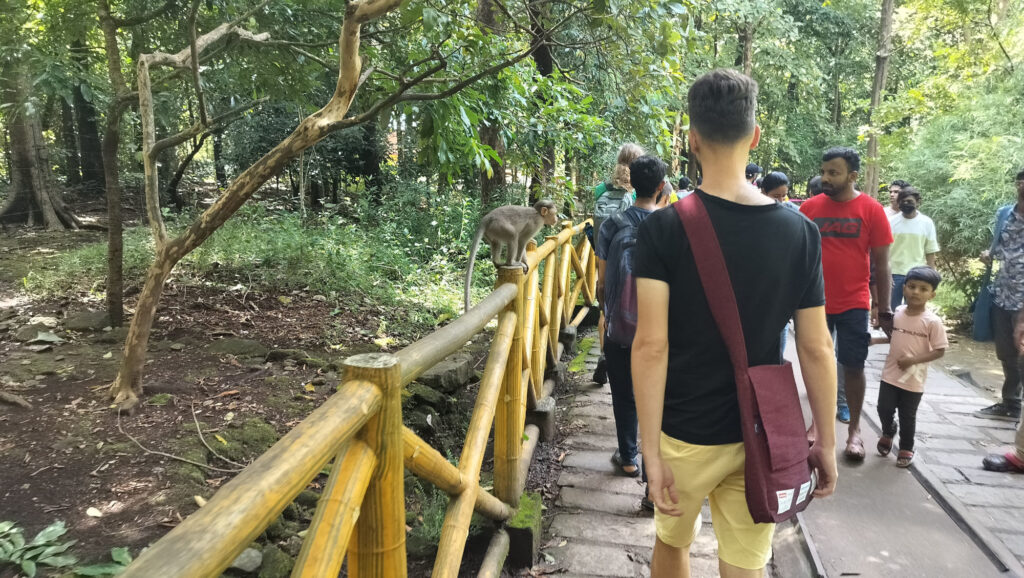


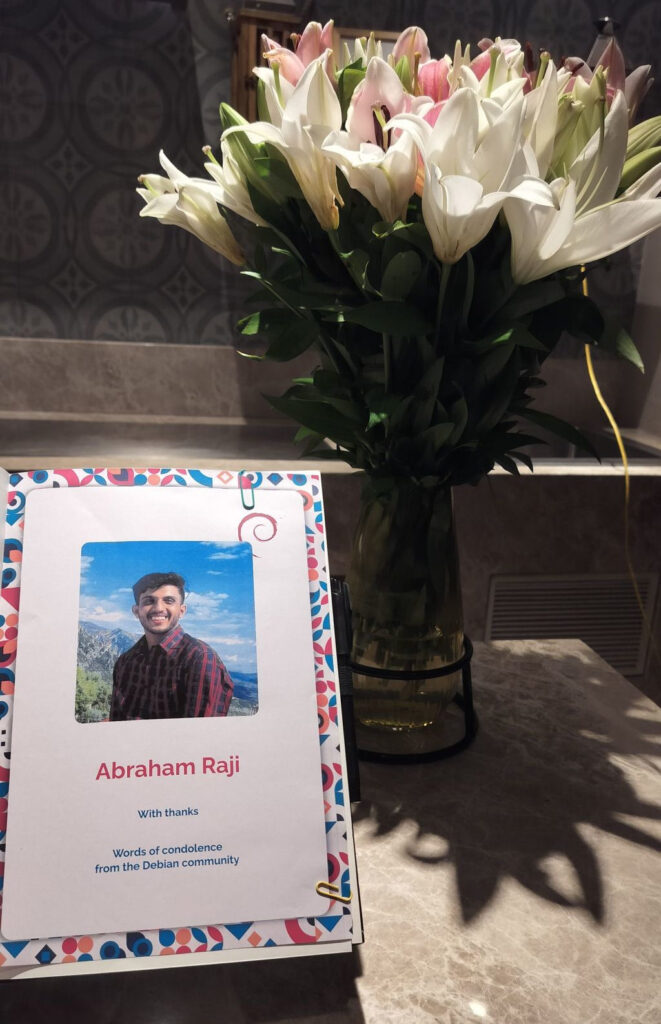
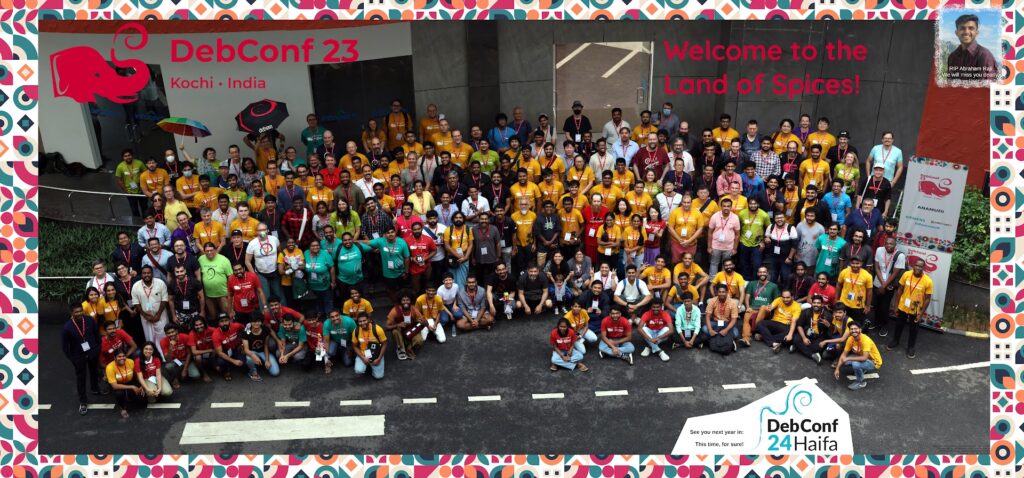
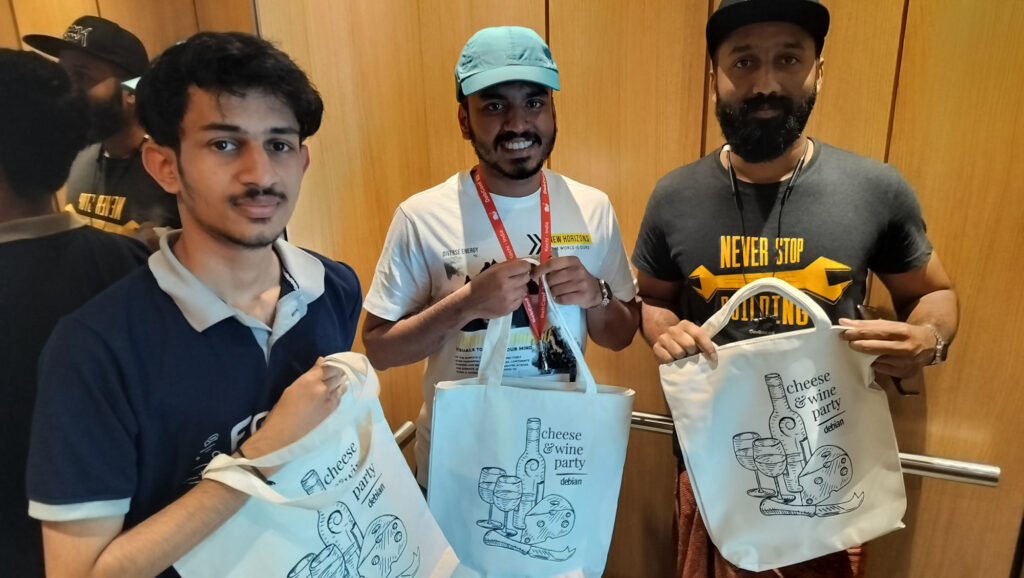 If you got one of these Cheese & Wine bags from DebConf, that s from the South African local group!
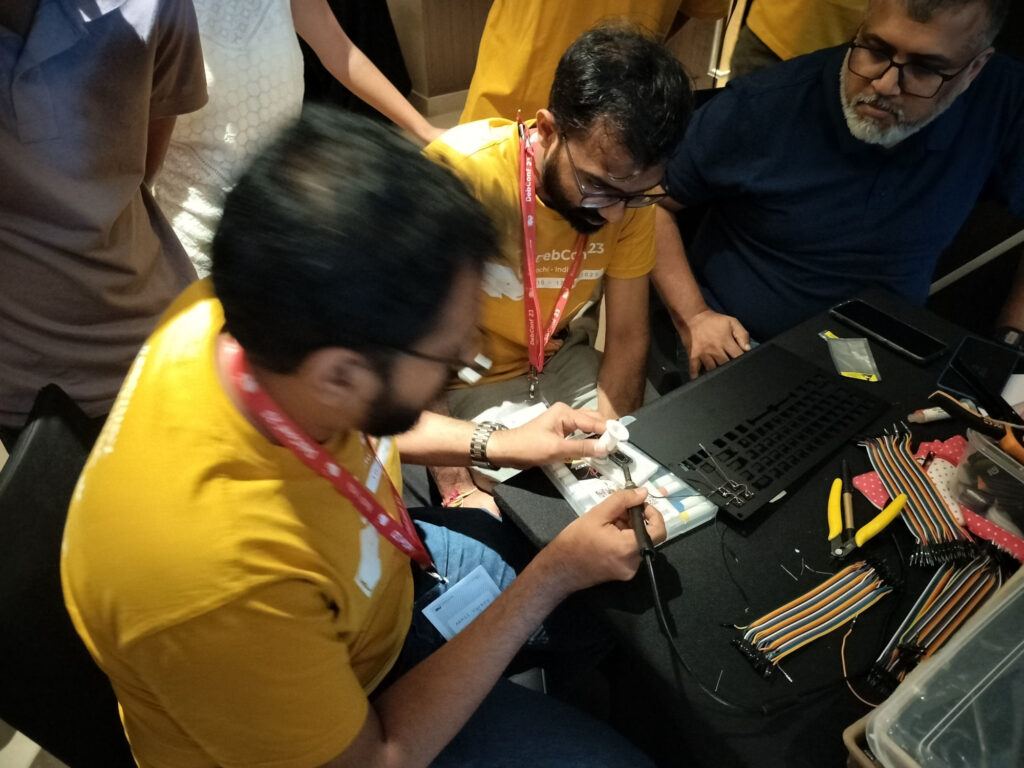 Some hopefully harmless soldering.


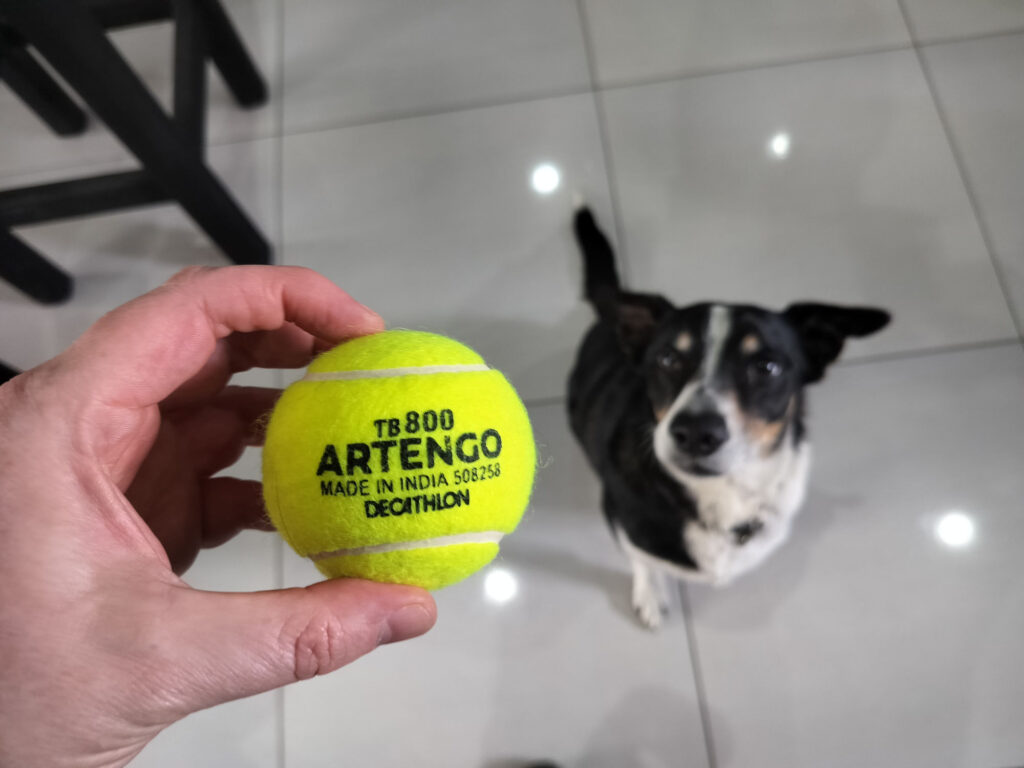


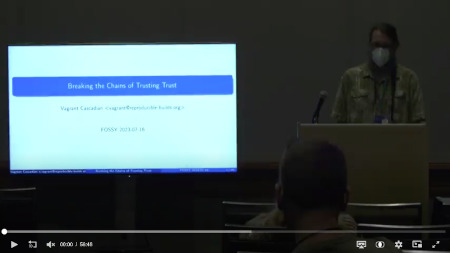


 The phrase "Root of Trust" turns up at various points in discussions about verified boot and measured boot, and to a first approximation nobody is able to give you a coherent explanation of what it means[1]. The Trusted Computing Group has a fairly wordy
  Reduce the size of your c: partition to the smallest it can be and then turn off windows with the understanding that you will never boot this system on the iron ever again.
 To find the literal path names of your detected drives you can run fdisk -l. Pay attention to the names of the partitions and the sizes of the drives to help determine which is which.
Once you have a shell in the netinst installer, you should maybe be able to run a command like the following. This will duplicate the disk located at if (in file) to the disk located at of (out file) while showing progress as the status.
To find the literal path names of your detected drives you can run fdisk -l. Pay attention to the names of the partitions and the sizes of the drives to help determine which is which.
Once you have a shell in the netinst installer, you should maybe be able to run a command like the following. This will duplicate the disk located at if (in file) to the disk located at of (out file) while showing progress as the status.
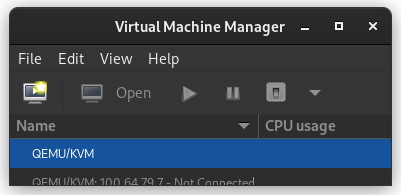 In the New VM window, select Import existing disk image
  When prompted for the path to the image, use the one we created with sudo qemu-img convert above.
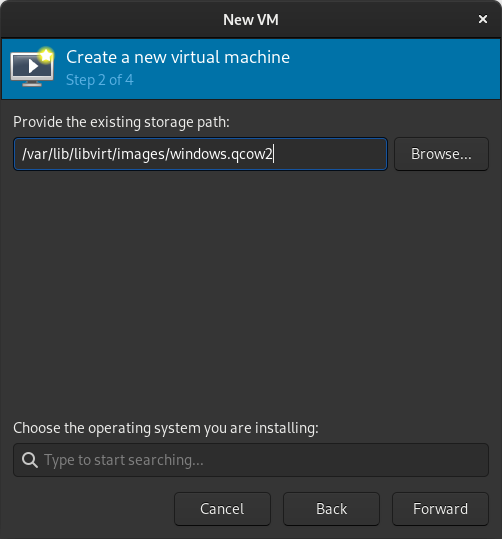 Select the version of Windows you want.
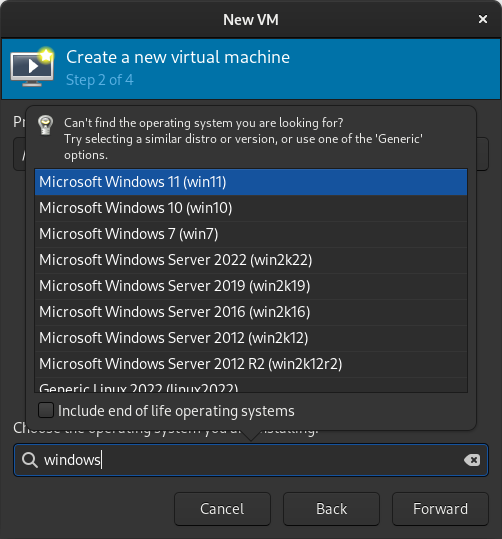 Select memory and CPUs to allocate to the VM.
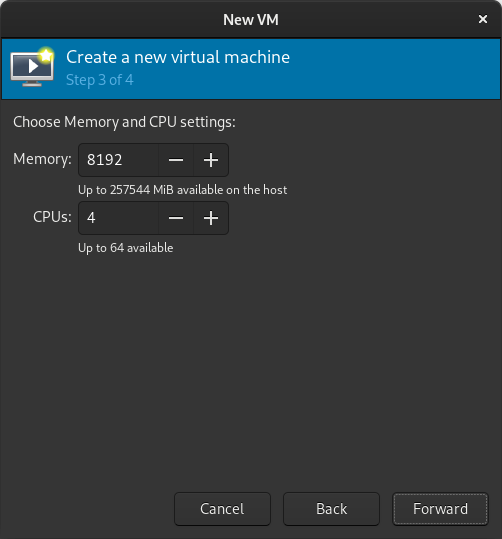 Tick the Customize configuration before install box
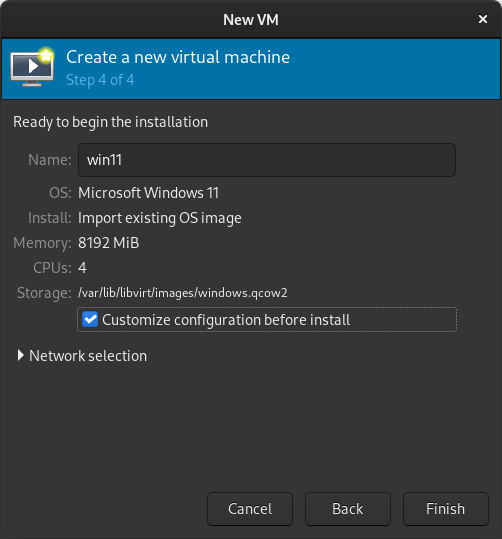 If you re prompted to enable the default network, do so now.
 The default hardware layout should probably suffice. Get it as close to the underlying hardware as it is convenient to do. But Windows is pretty lenient these days about virtualizing licensed windows instances so long as they re not running in more than one place at a time.
 Good luck! Leave comments if you have questions.


 Way back at
  The Brazilian translation team
 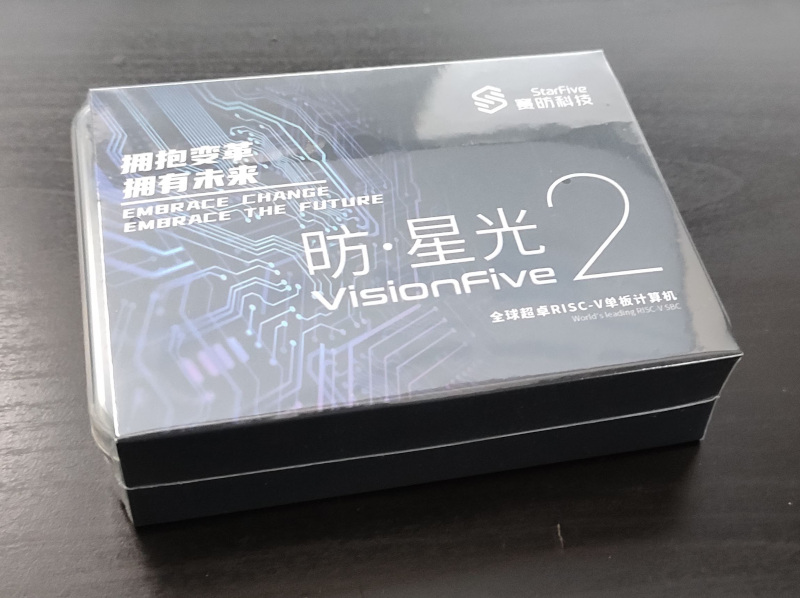 Back in September last year I chose to back the
 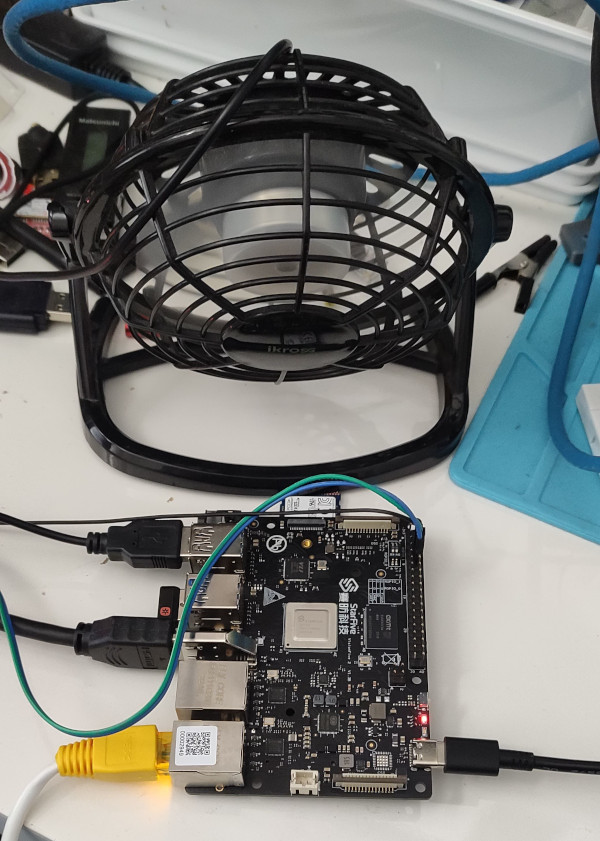 I haven t seen any actual stability problems, but I wouldn t want to run for any length of time like that. I ve ordered a heatsink and also realised that the board supports a Raspberry Pi style PoE Hat , so I ve got one of those that includes a fan ordered (I am a complete convert to PoE especially for small systems like this).
With the desk fan setup I ve been able to run the board for extended periods under load (I did a full recompile of the Debian 6.1.12-1 kernel package and it took about 10 hours). The M.2 slot is unfortunately only a single PCIe v2 lane, and my testing topped out at about 180MB/s. IIRC that is about half what the slot should be capable of, and less than a 10th of what the SSD can do. Ethernet testing with
I haven t seen any actual stability problems, but I wouldn t want to run for any length of time like that. I ve ordered a heatsink and also realised that the board supports a Raspberry Pi style PoE Hat , so I ve got one of those that includes a fan ordered (I am a complete convert to PoE especially for small systems like this).
With the desk fan setup I ve been able to run the board for extended periods under load (I did a full recompile of the Debian 6.1.12-1 kernel package and it took about 10 hours). The M.2 slot is unfortunately only a single PCIe v2 lane, and my testing topped out at about 180MB/s. IIRC that is about half what the slot should be capable of, and less than a 10th of what the SSD can do. Ethernet testing with